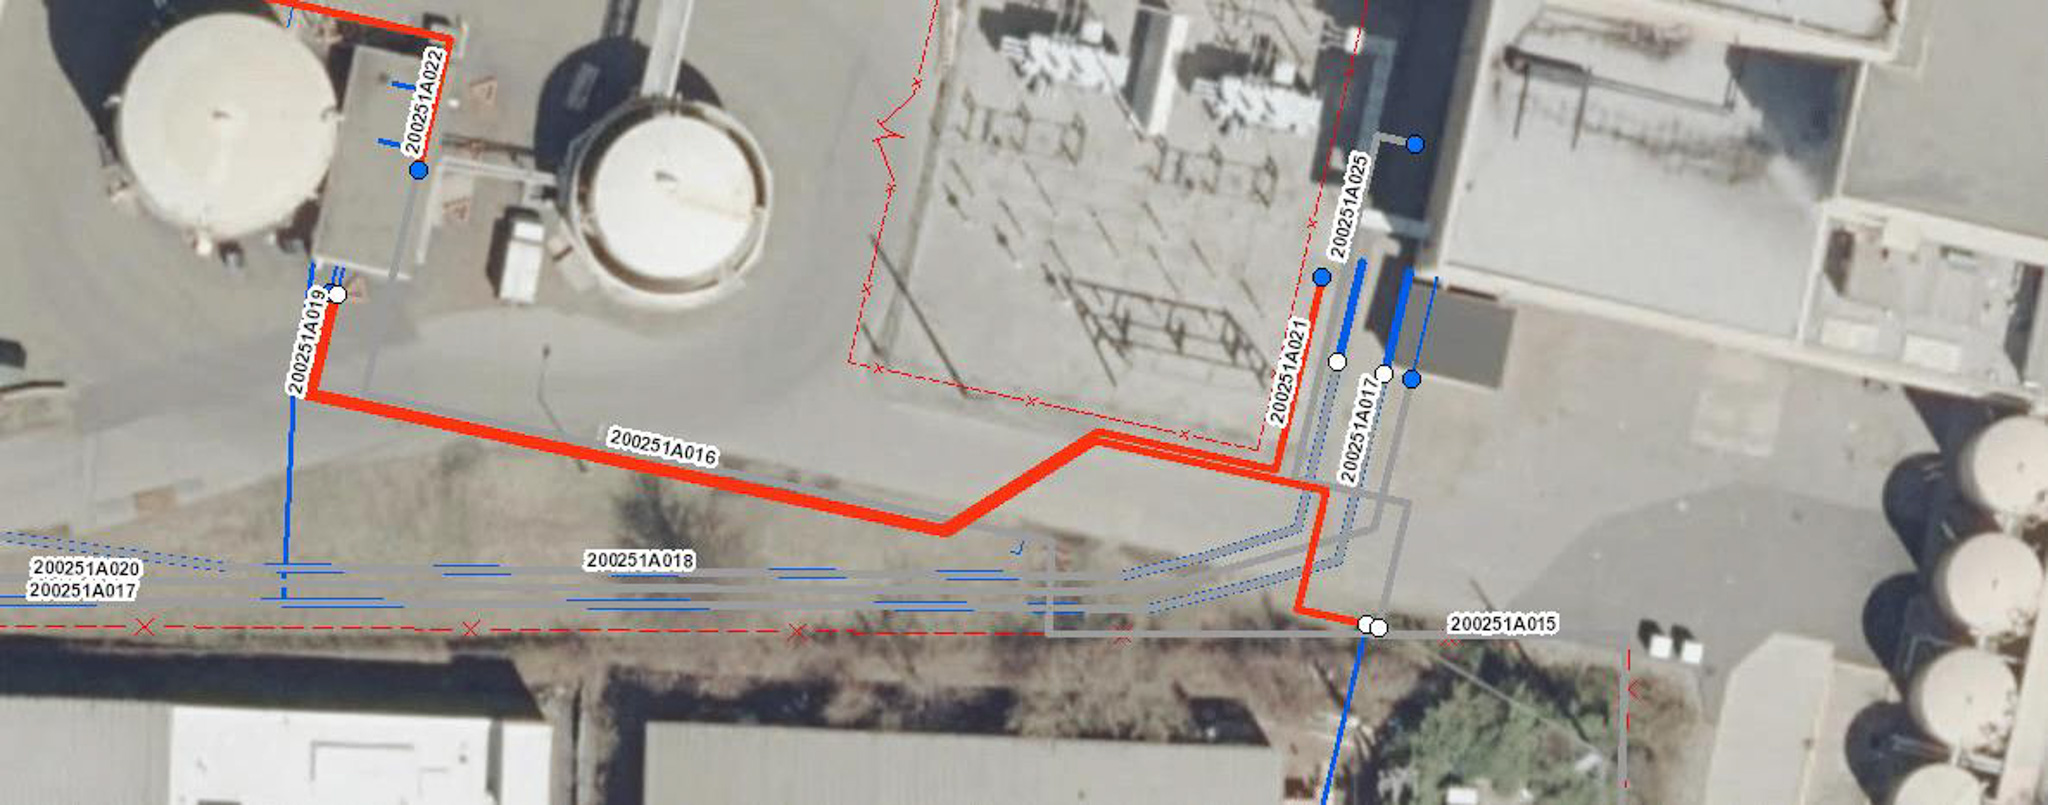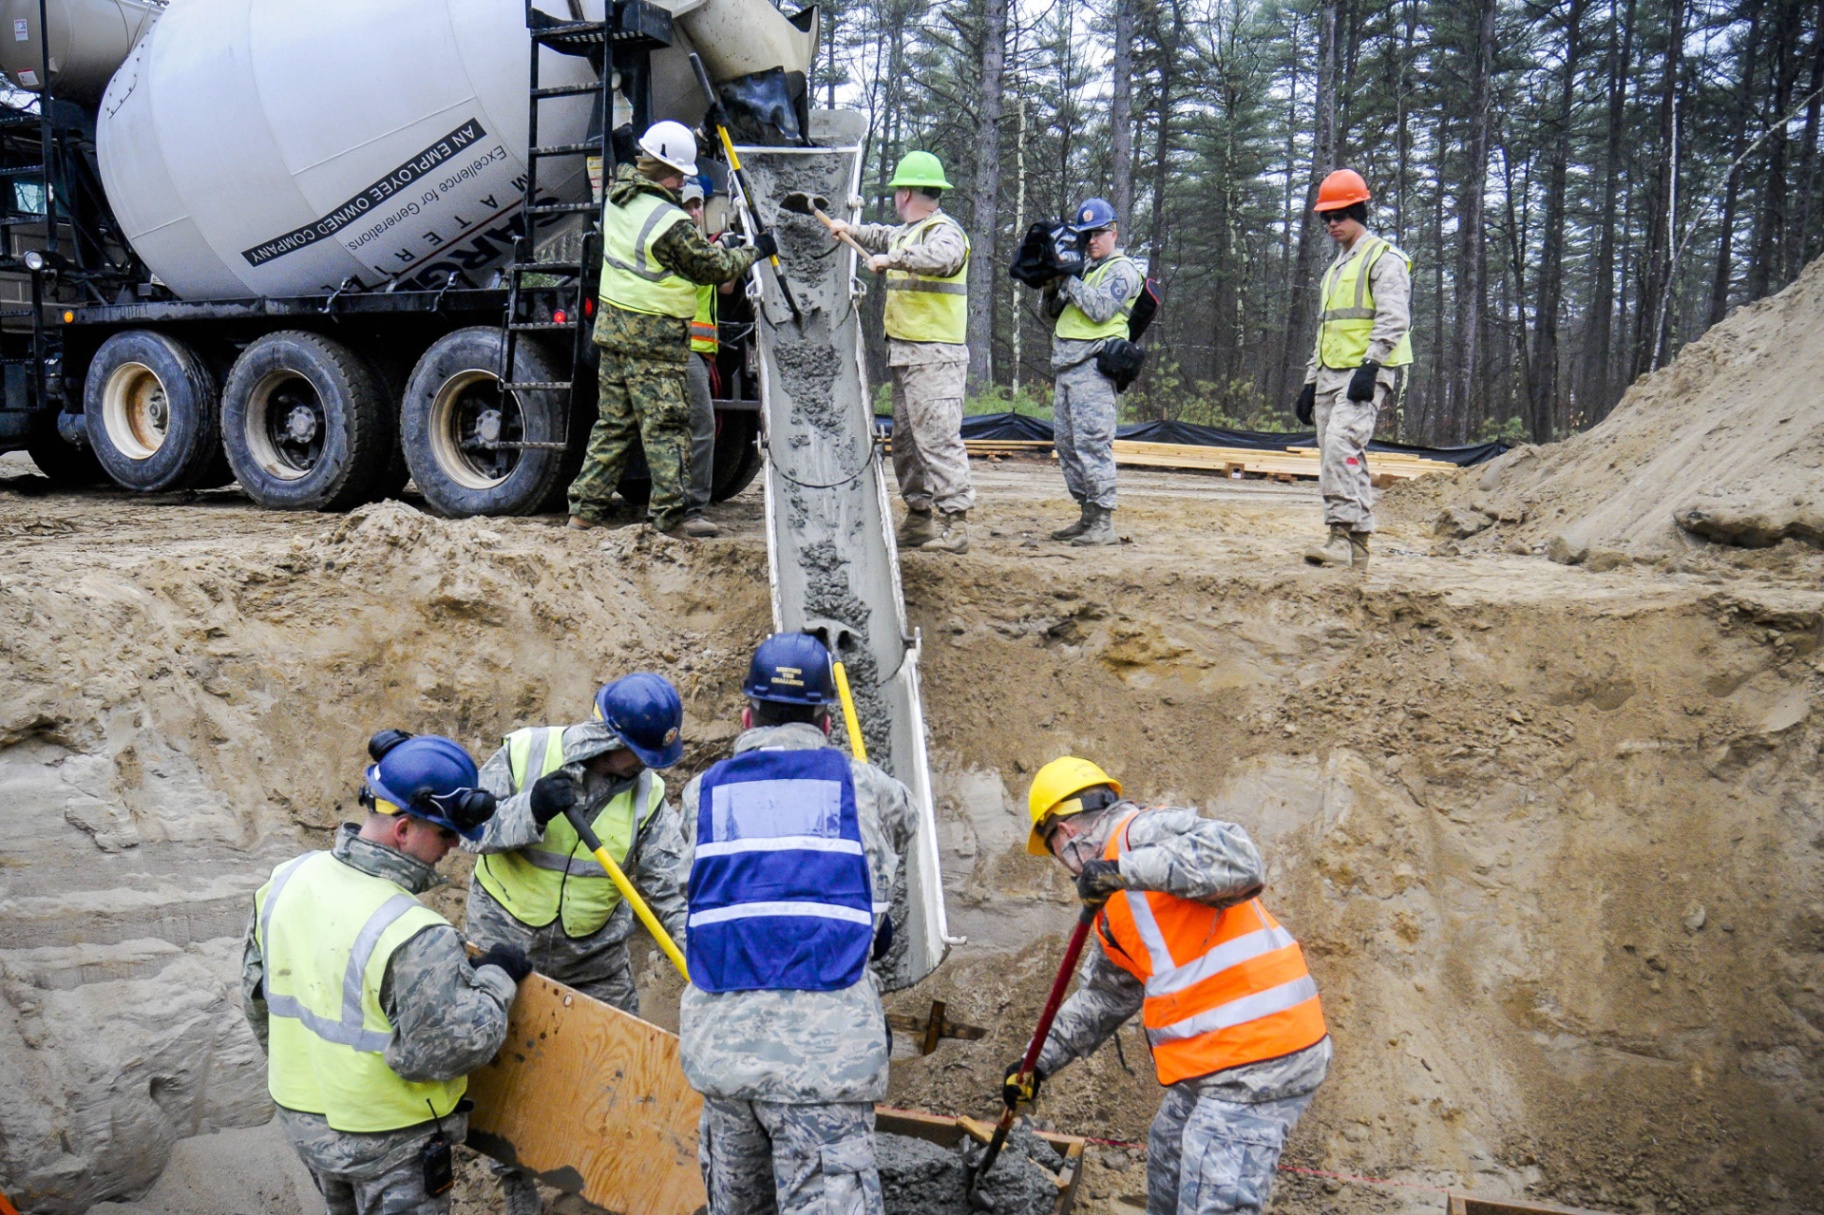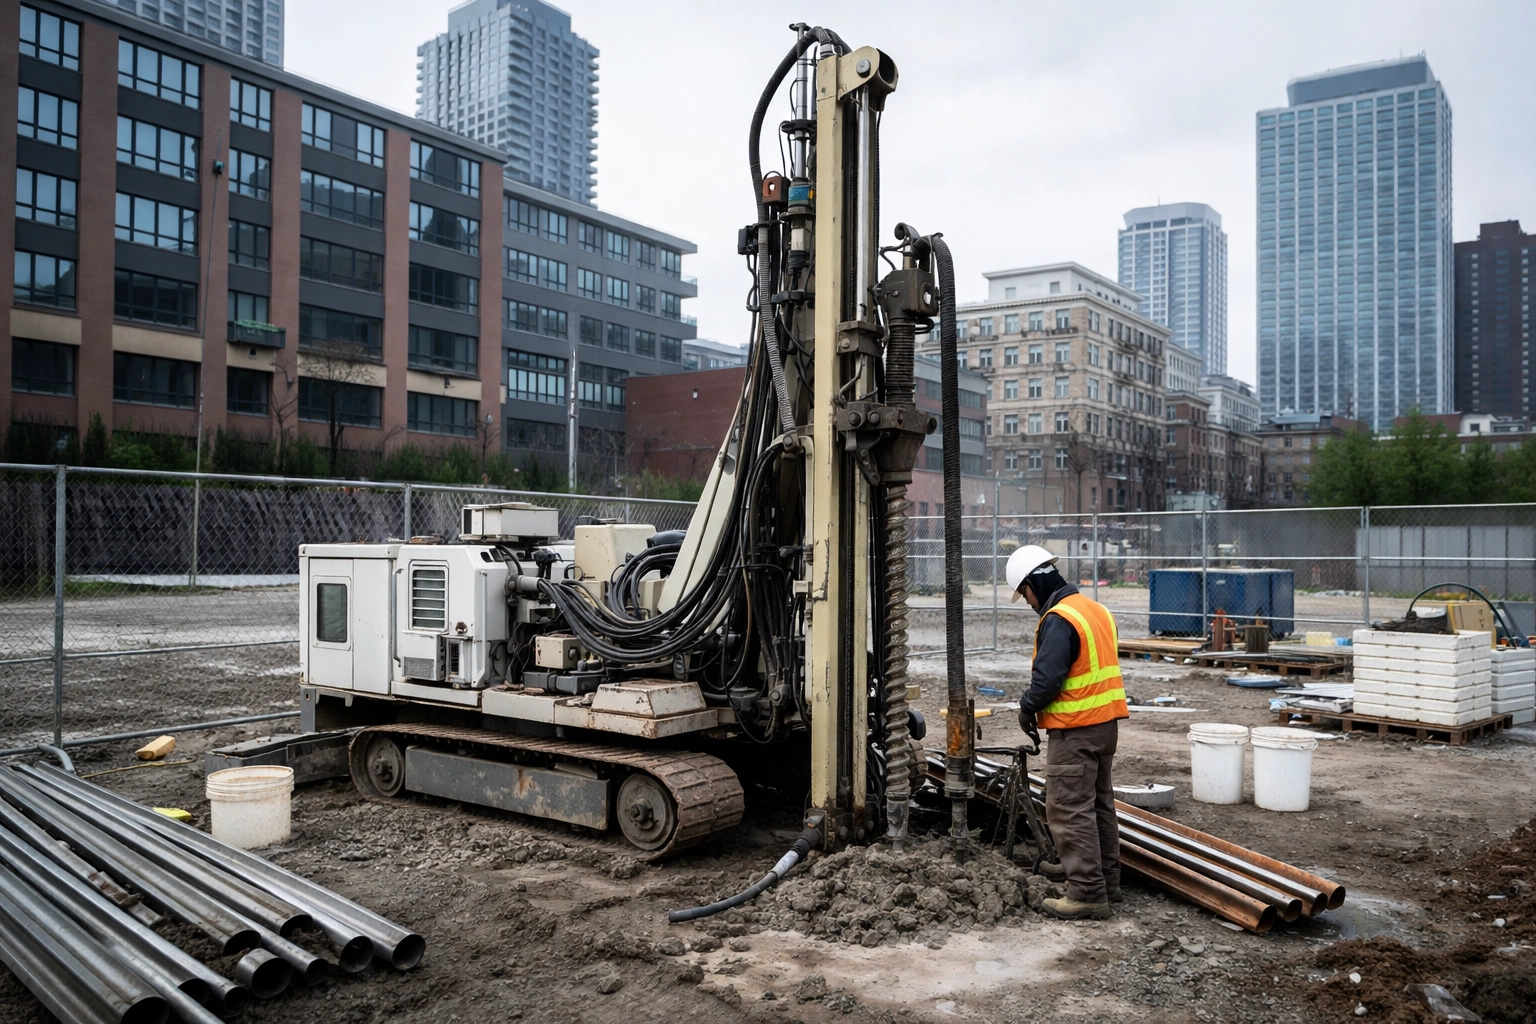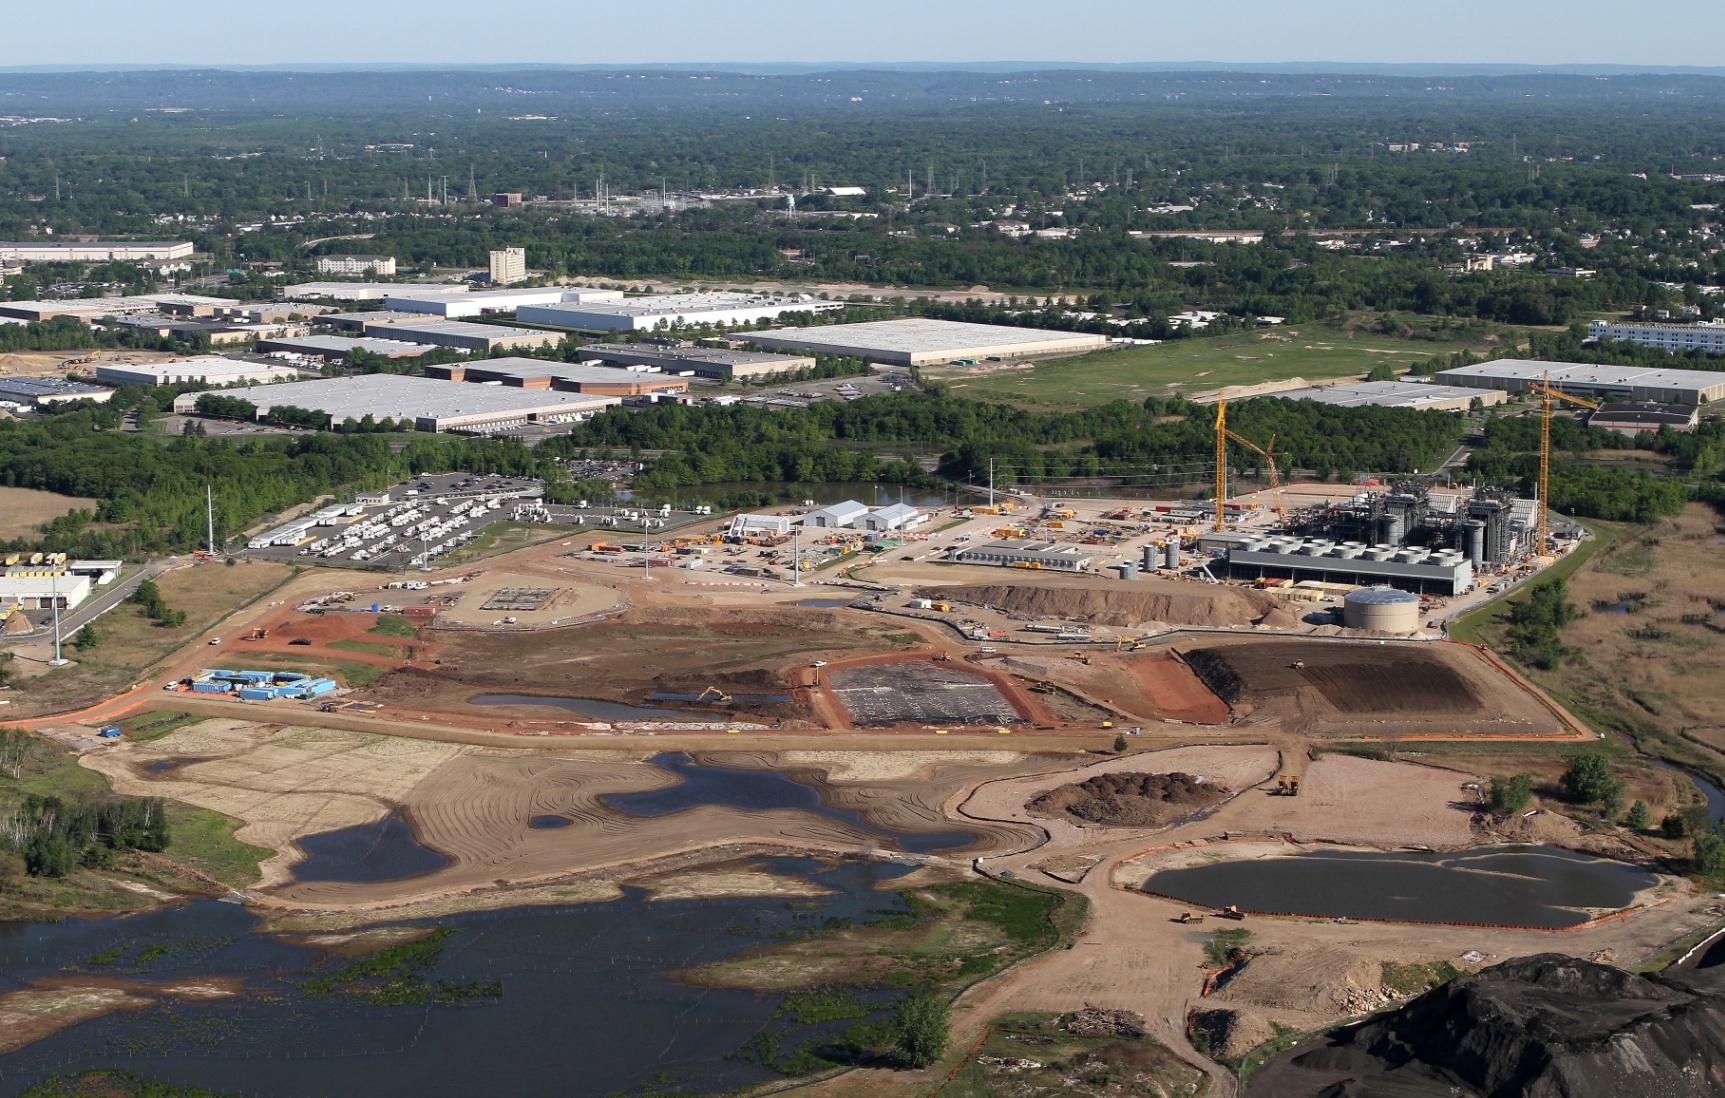
Author: envicongroup_wwra53

  • Are You Making These Common Geotechnical Investigation Mistakes on Redevelopment Sites?

    Are You Making These Common Geotechnical Investigation Mistakes on Redevelopment Sites?

    Urban infill and redevelopment projects in NYC and New Jersey present some of the most complex subsurface challenges in the industry. You're not dealing with a virgin greenfield: you're working with decades (sometimes centuries) of disturbance, undocumented fill, abandoned utilities, and soil conditions that have been altered by previous construction.

    The stakes are high. A geotechnical investigation mistake on a redevelopment site doesn't just delay your project: it can blow your budget, trigger regulatory scrutiny, and leave you holding the bag on foundation failures that could have been avoided with proper due diligence upfront.

    Here's the reality: most of these mistakes are preventable. Let's walk through the most common geotechnical investigation errors we see on redevelopment sites and how to avoid them.

    Mistake #1: Conducting an Inadequate Site Investigation

    This is the big one. Insufficient investigation depth and scope is the leading cause of geotechnical failures on redevelopment projects.

    We get it: budgets are tight, timelines are compressed, and there's pressure to move fast. But cutting corners on your boring program or skipping in-situ testing like Standard Penetration Tests (SPTs) and Cone Penetration Tests (CPTs) is a false economy.
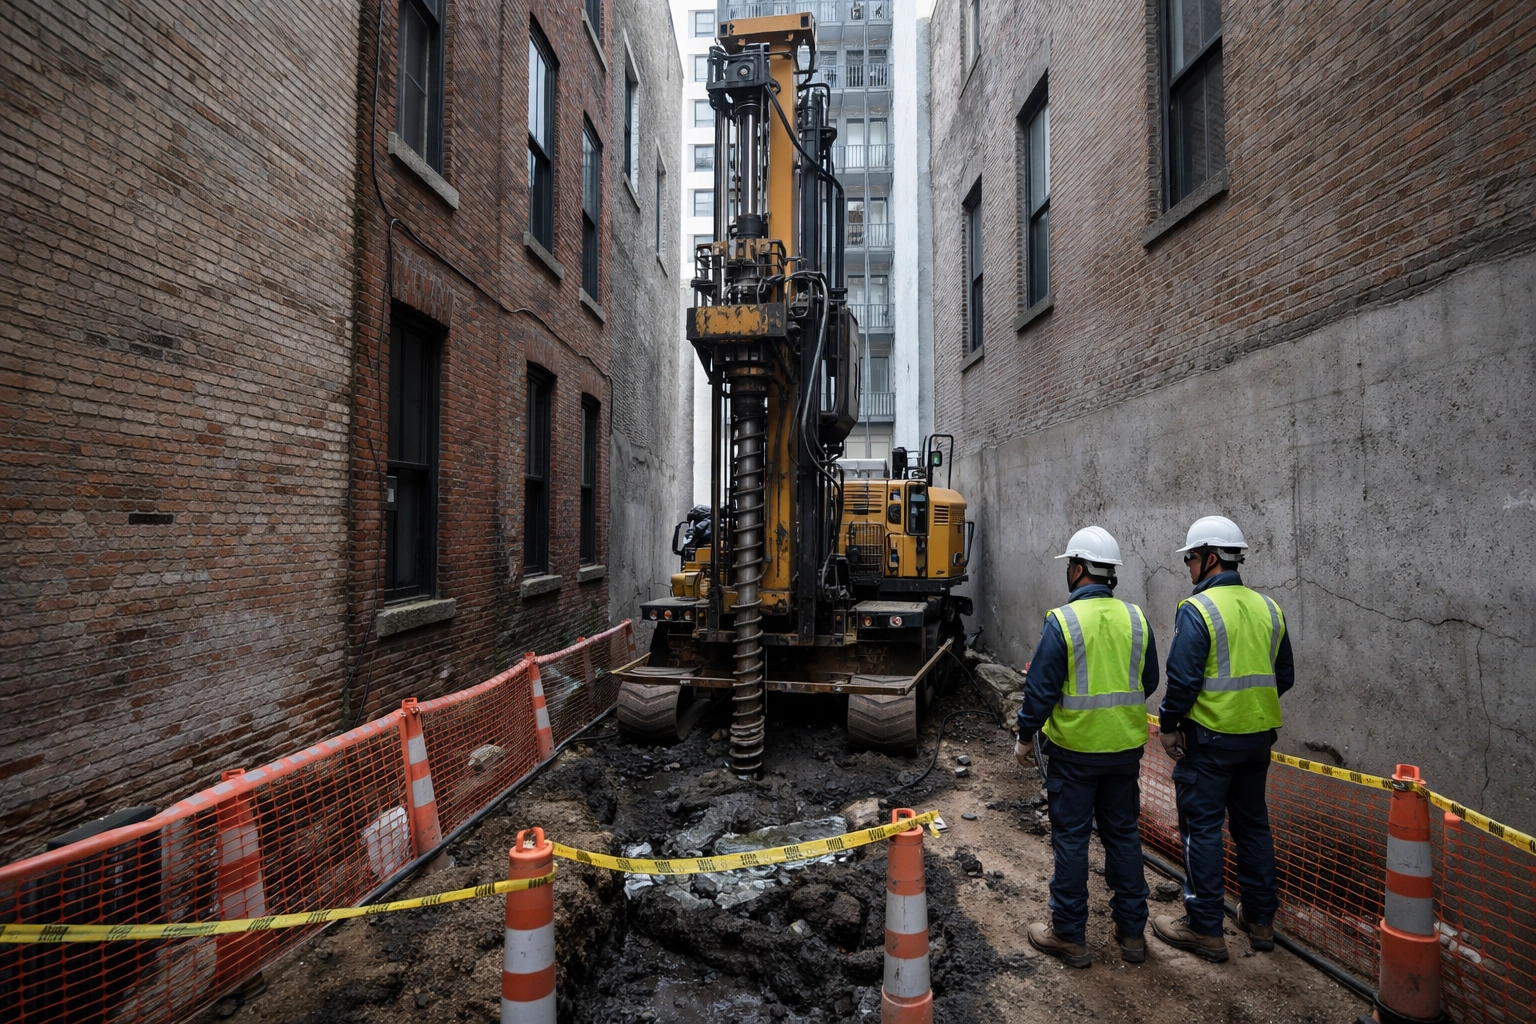
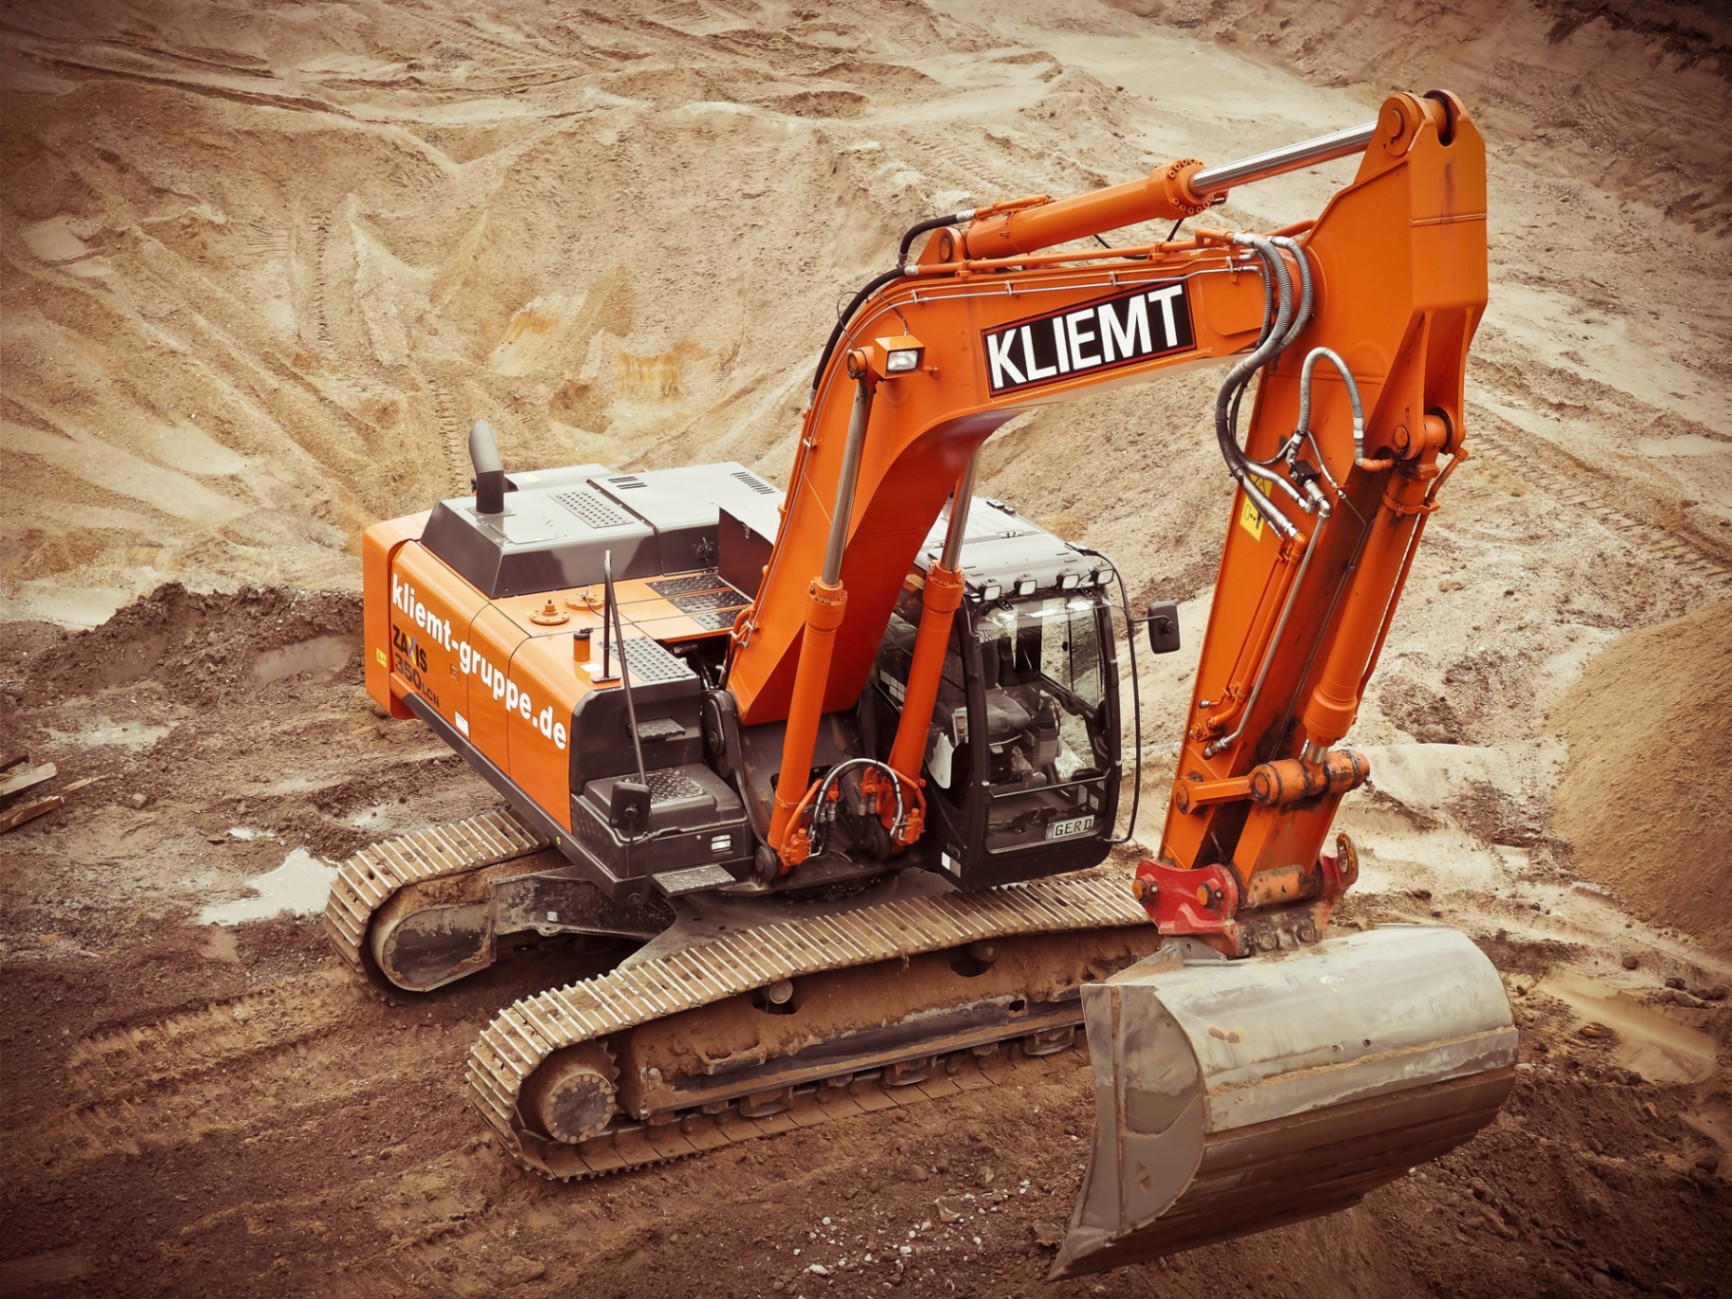
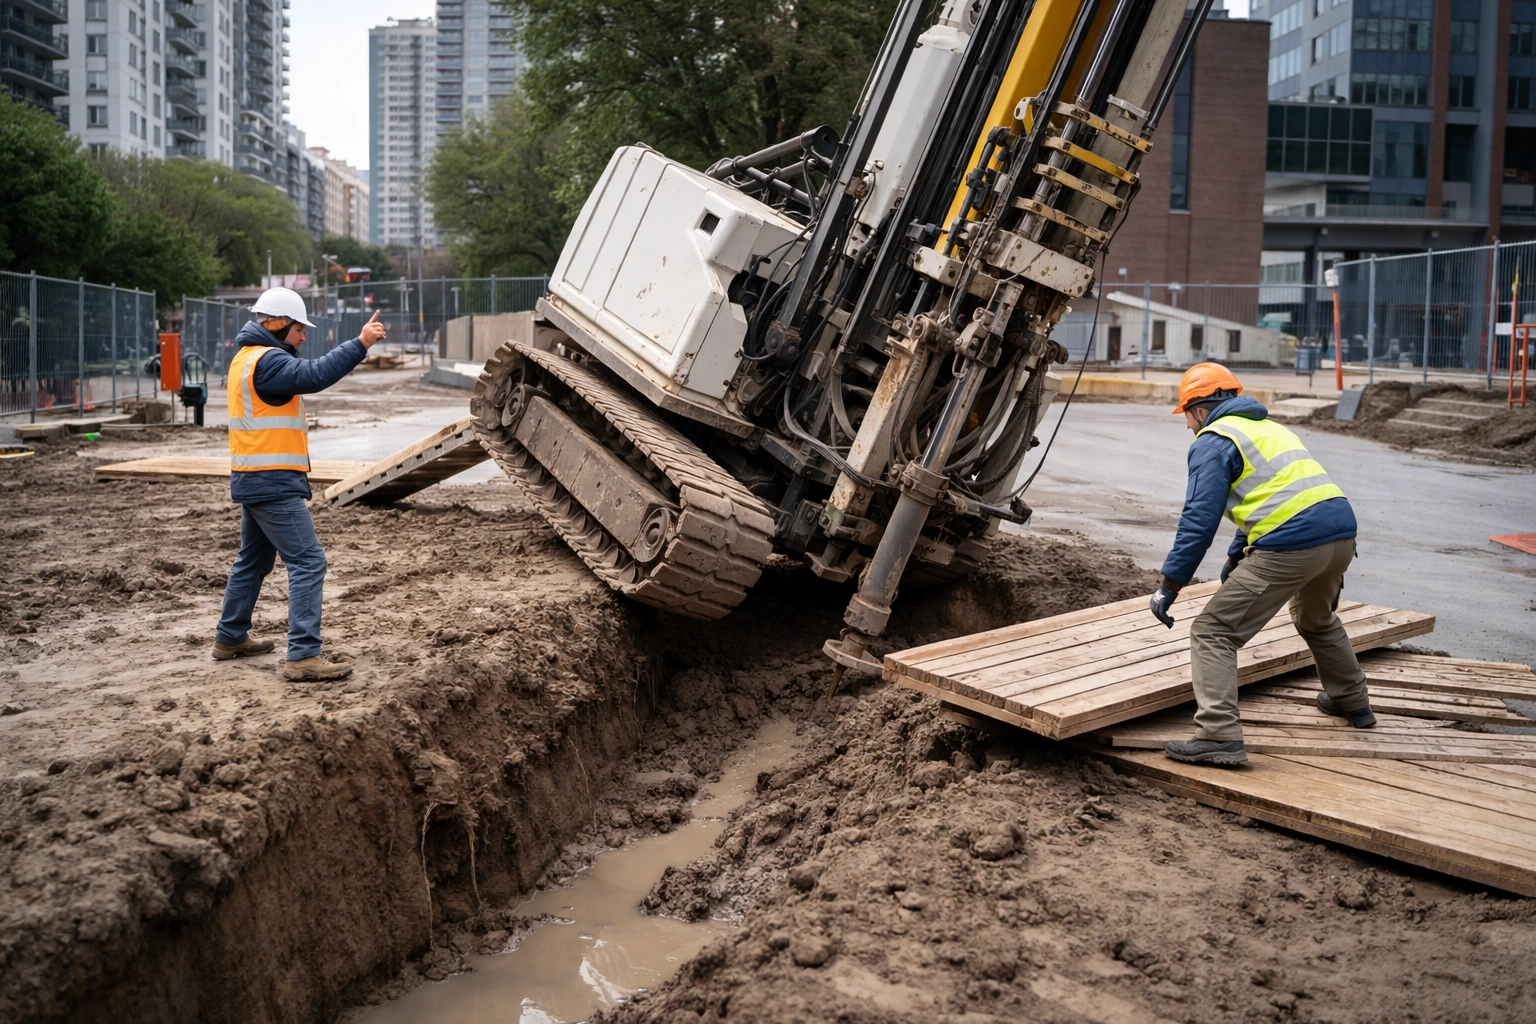
    Excavator and Crew at Urban Redevelopment Site

    On redevelopment sites specifically, the subsurface is rarely what you expect. Previous construction, demolition debris, and uncontrolled fill materials can obscure actual soil conditions. What looks like competent bearing material at 10 feet might be sitting on top of a compressible layer that wasn't discovered because the borings didn't go deep enough.

    The fix: Invest in a comprehensive investigation that accounts for the site's history. More borings, deeper penetration, and site-specific testing are not luxuries: they're risk management.

    Mistake #2: Assuming Subsurface Uniformity

    Here's a scenario we've seen play out more times than we can count: a developer conducts a boring program that meets minimum code requirements, gets a clean-looking report, and proceeds with confidence. Then, during excavation, they hit a compressible soil layer or unexpected fill that wasn't captured in the investigation.

    The assumption that subsurface conditions are uniform across a site is one of the most dangerous mistakes you can make: especially on urban infill projects where the ground has been disturbed multiple times over decades.

    "Even when boring programs meet minimum code requirements, compressible or unexpected soil layers can exist between sample points. One well-documented case involving the Taipei Mass Rapid Transit Systems demonstrated that a compressible soil layer went undetected despite adequate borehole spacing."

    What we recommend:

    • Never rely solely on generalized soil properties: insist on site-specific laboratory testing
    • Increase boring density on sites with known historical disturbance
    • Use geophysical methods to fill in gaps between borings when budget allows
    • Always assume there's something you haven't found yet

    Mistake #3: Overlooking Site History

    This mistake is particularly costly on redevelopment sites. Failing to review planning records, as-built drawings, and permit approvals from previous development can leave you blind to underground hazards.

    We're talking about:

    • Undocumented fill from previous demolitions
    • Abandoned foundations and utilities
    • Old underground storage tanks
    • Historical grading changes that altered drainage patterns
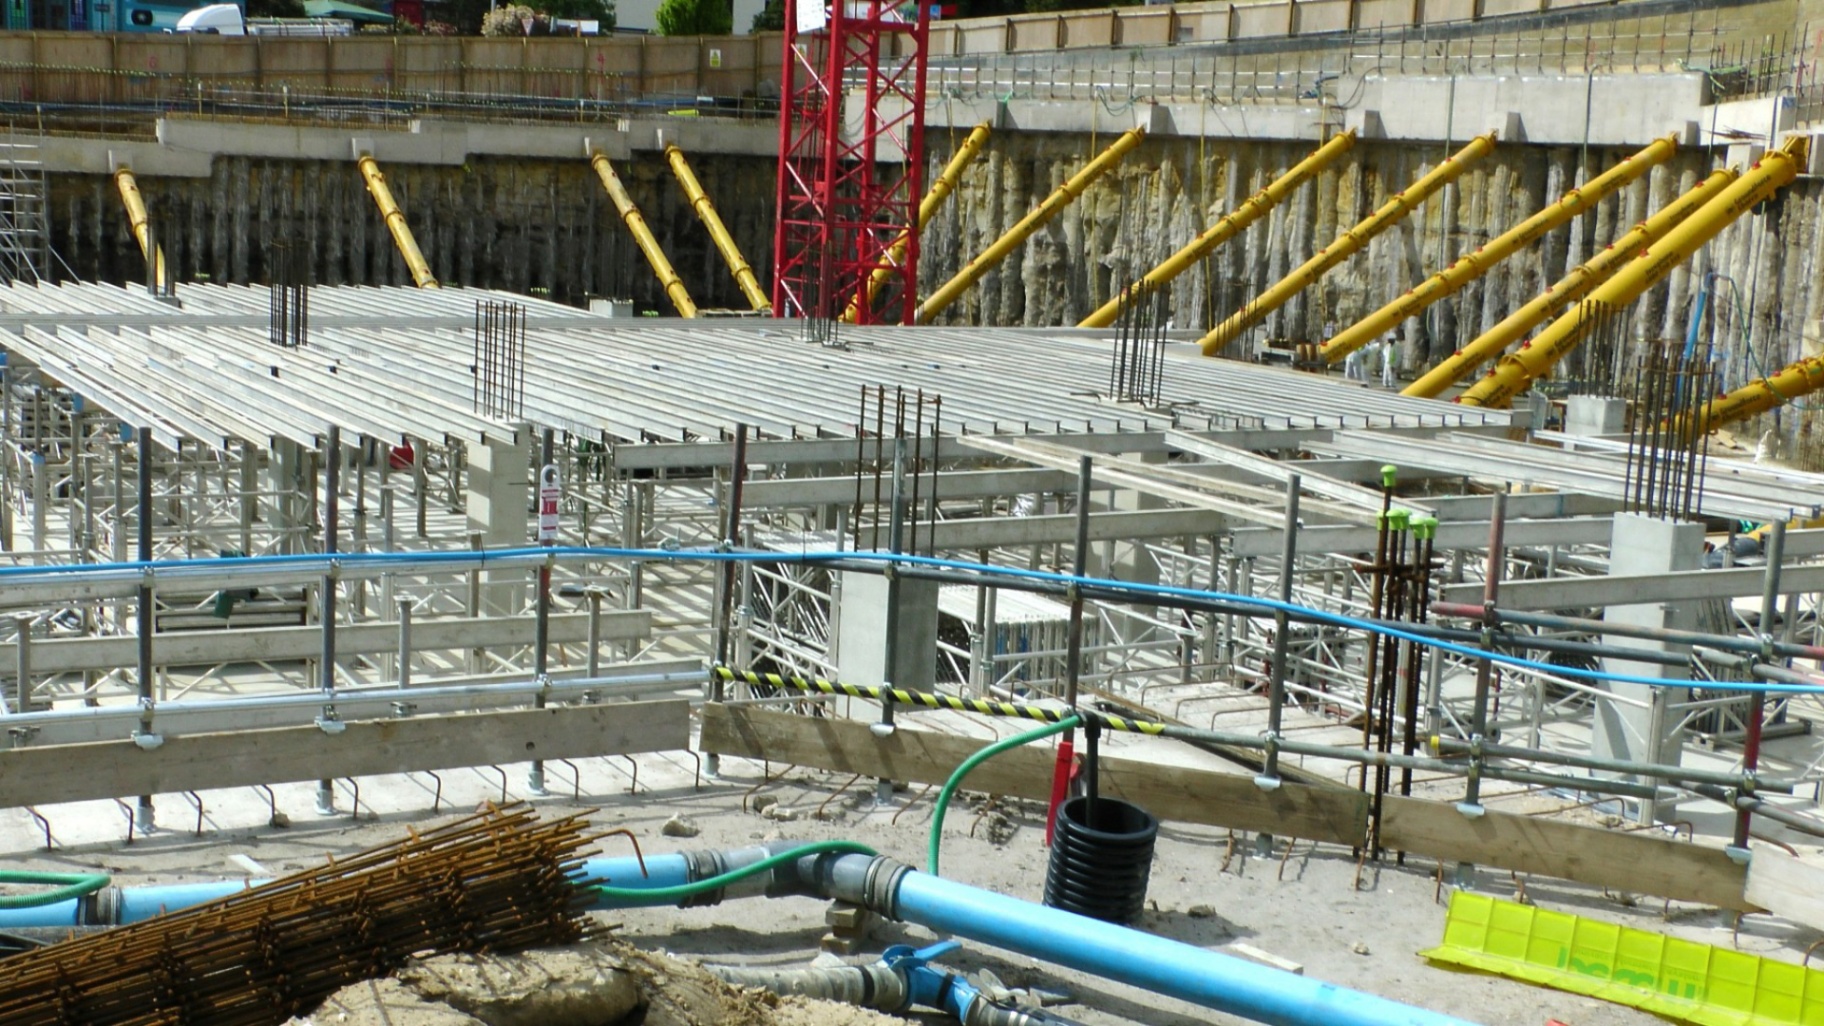
    Active construction site

    A thorough environmental site assessment should always precede or run parallel to your geotechnical investigation. The historical research conducted during a Phase I ESA often reveals critical information about previous site uses that directly impacts your geotechnical approach.

    Pro tip: Cross-reference your geotechnical findings with environmental data. If a Phase II ESA identified contaminated fill in a specific area, that same fill likely has geotechnical implications that need to be addressed.

    Mistake #4: Ignoring or Partially Applying Geotechnical Recommendations

    Your geotechnical engineer delivers a thorough report with specific recommendations for soil improvement, foundation design, and drainage systems. Then, somewhere between design and construction, those recommendations get value-engineered out of the project.

    This happens more often than you'd think. Contractors omit recommended subdrains to save costs. Developers skip specified soil improvements to accelerate the schedule. The geotechnical report ends up as a reference document rather than a construction mandate.

    The result? Foundation settlement, drainage failures, and remediation costs that far exceed what the original recommendations would have cost to implement.

    The bottom line: Geotechnical recommendations exist for a reason. If budget constraints require modifications, bring your geotechnical engineer back to the table to evaluate alternatives: don't make those decisions unilaterally.

    Mistake #5: Failing to Account for Groundwater

    Groundwater is the wild card on redevelopment sites. Historical modifications: old foundations, underground structures, altered drainage patterns: may have fundamentally changed how water moves through the subsurface.
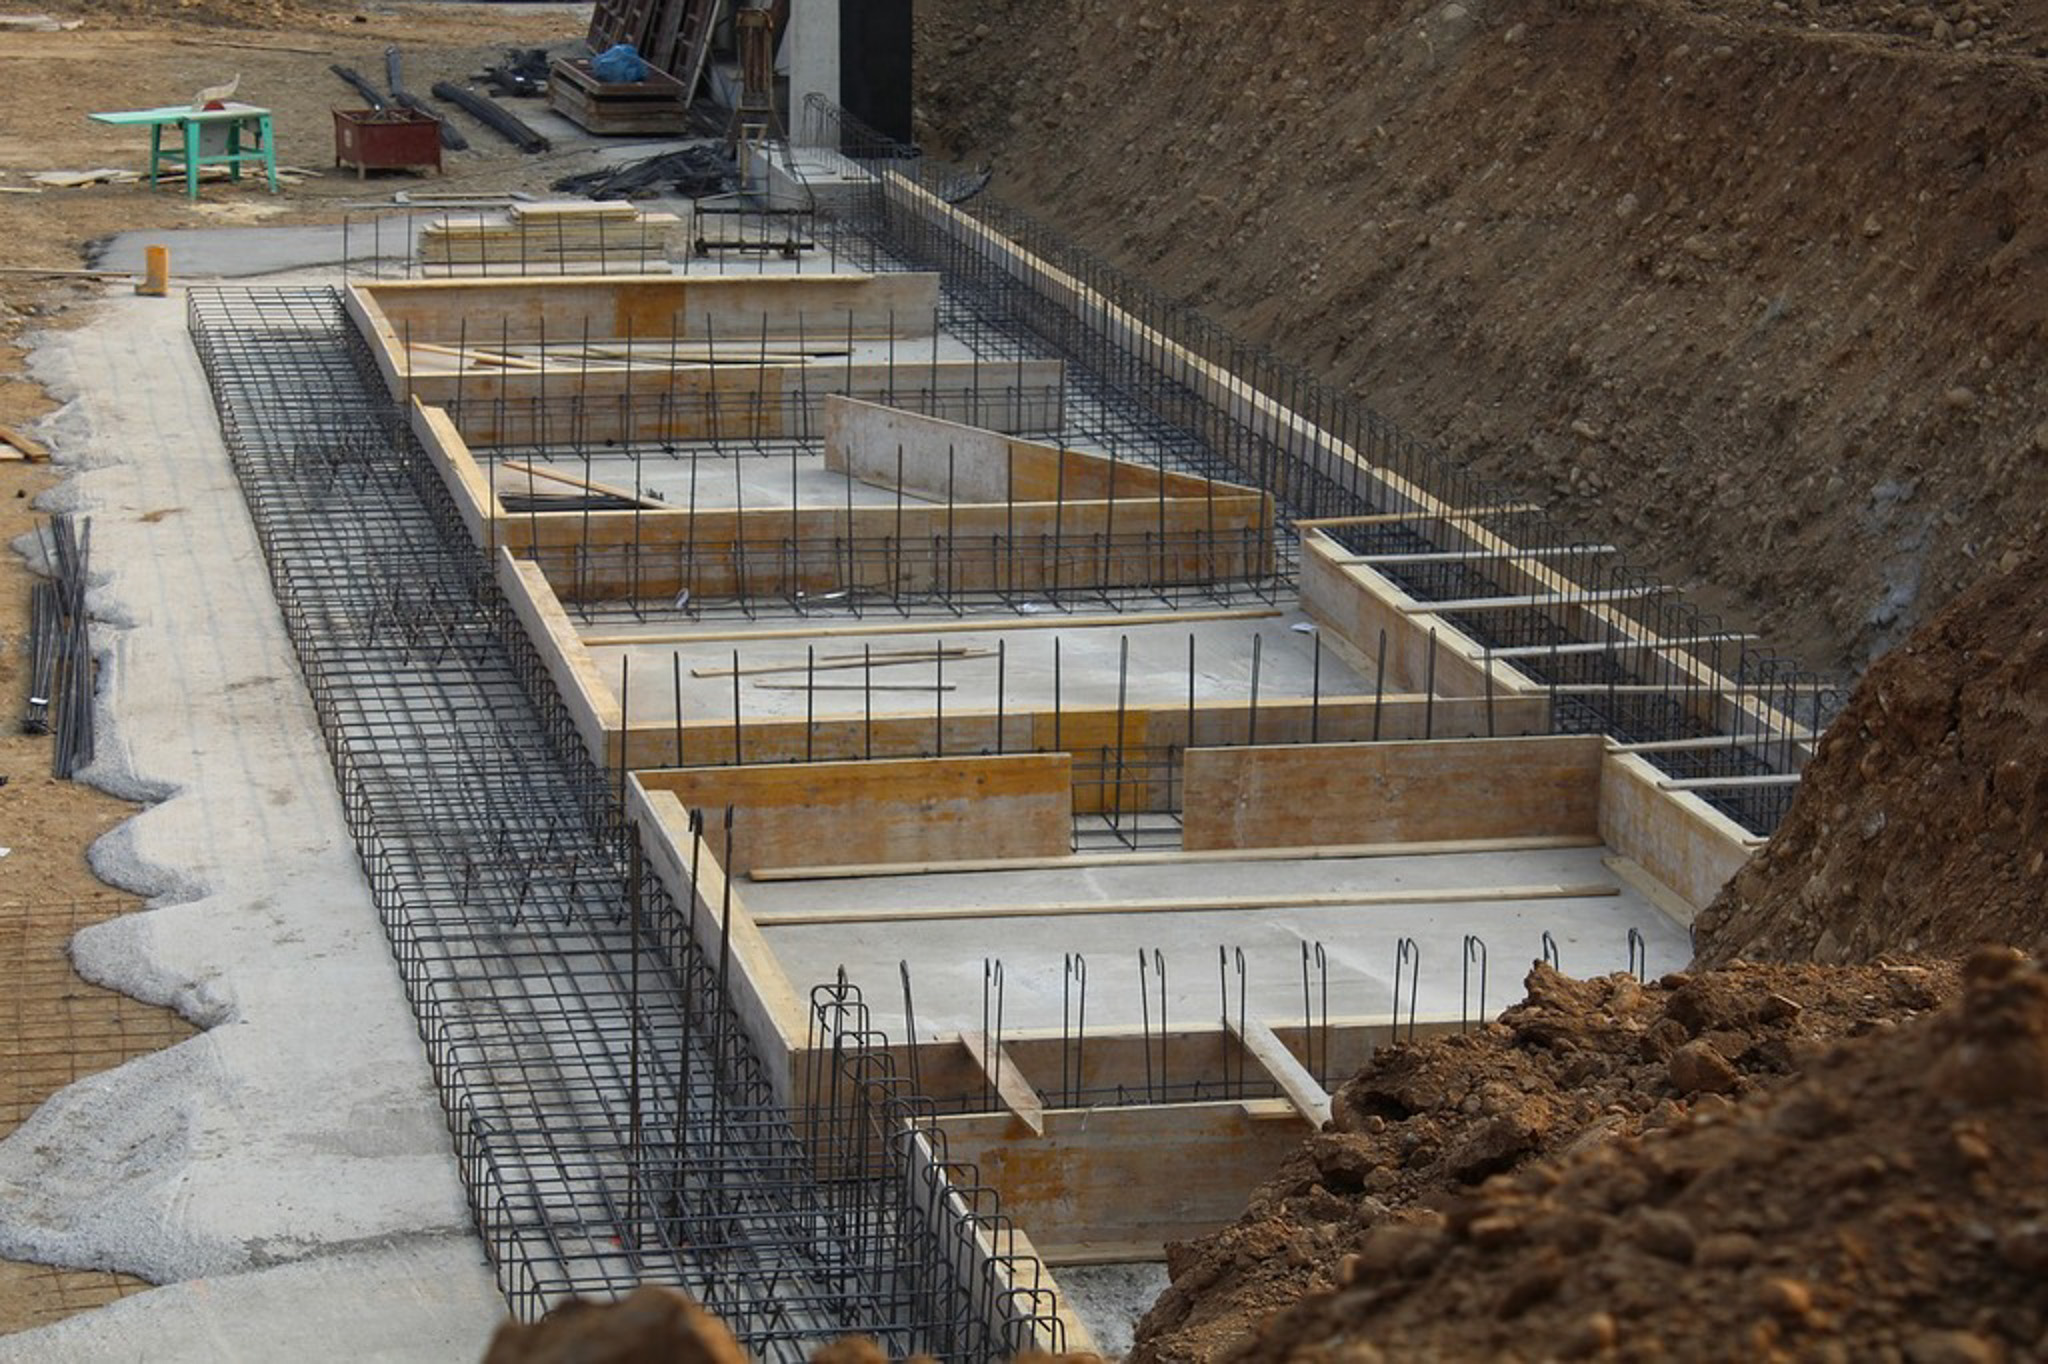
    Concrete Foundation Footing Construction Site

    Failing to properly account for groundwater levels and seasonal fluctuations can lead to:

    • Buoyancy issues with below-grade structures
    • Soil movement and settlement during wet seasons
    • Dewatering complications during construction
    • Long-term drainage problems that compromise foundation integrity

    On urban infill sites in the NY/NJ metro area, we frequently encounter perched water tables, historic stream channels that have been filled, and groundwater contamination that requires coordination between geotechnical and environmental teams.

    What to do: Monitor groundwater levels over time if possible. A single measurement during a dry season won't tell you what happens during spring thaw or after heavy rainfall. Factor seasonal variation into your design assumptions.

    Mistake #6: Poor Construction Oversight and Quality Control

    Even the best geotechnical investigation and design can be undermined by poor execution in the field. We've seen projects where:

    • Specified subdrains were omitted without approval
    • Fill was placed without proper compaction testing
    • Excavation support deviated from approved plans
    • Erosion control measures were never implemented

    Construction quality gaps are especially problematic on redevelopment sites where conditions can change rapidly as you expose different soil layers and encounter unexpected subsurface features.

    "Rigorous quality control during construction is just as important as the investigation itself. Deviations from approved plans: even minor ones: can have cascading effects on foundation performance."

    Our approach: We recommend having your geotechnical engineer on-site during critical construction phases: not just available by phone. Real-time observation allows for immediate adjustments when field conditions differ from what was anticipated in the report.

    How to De-Risk Your Next Redevelopment Project

    Avoiding these mistakes isn't complicated, but it does require discipline and a willingness to invest appropriately in the investigation phase. Here's the playbook:

    • Conduct comprehensive investigations that go beyond minimum code requirements
    • Review historical records thoroughly before finalizing your boring program
    • Integrate geotechnical and environmental data for a complete subsurface picture
    • Follow all recommendations from your geotechnical report: or formally evaluate alternatives with your engineer
    • Monitor groundwater over time, not just at a single point
    • Maintain quality control during construction with on-site engineering oversight

    At Envicon, we've supported complex urban infill and redevelopment projects across New York and New Jersey where getting the subsurface right was the difference between a successful development and a costly delay. Our integrated approach: combining environmental assessment, geotechnical investigation, and civil engineering: ensures nothing falls through the cracks.

    The Bottom Line

    Geotechnical investigation mistakes on redevelopment sites are almost always more expensive to fix than to prevent. The cost of additional borings, deeper investigations, and thorough historical research is a fraction of what you'll spend addressing foundation failures, regulatory issues, or construction delays caused by unexpected subsurface conditions.

    Don't let budget pressure or schedule constraints push you toward shortcuts that create long-term risk. Invest in the investigation upfront, follow the recommendations, and maintain quality control through construction.

    Your foundation: and your bottom line( will thank you.)
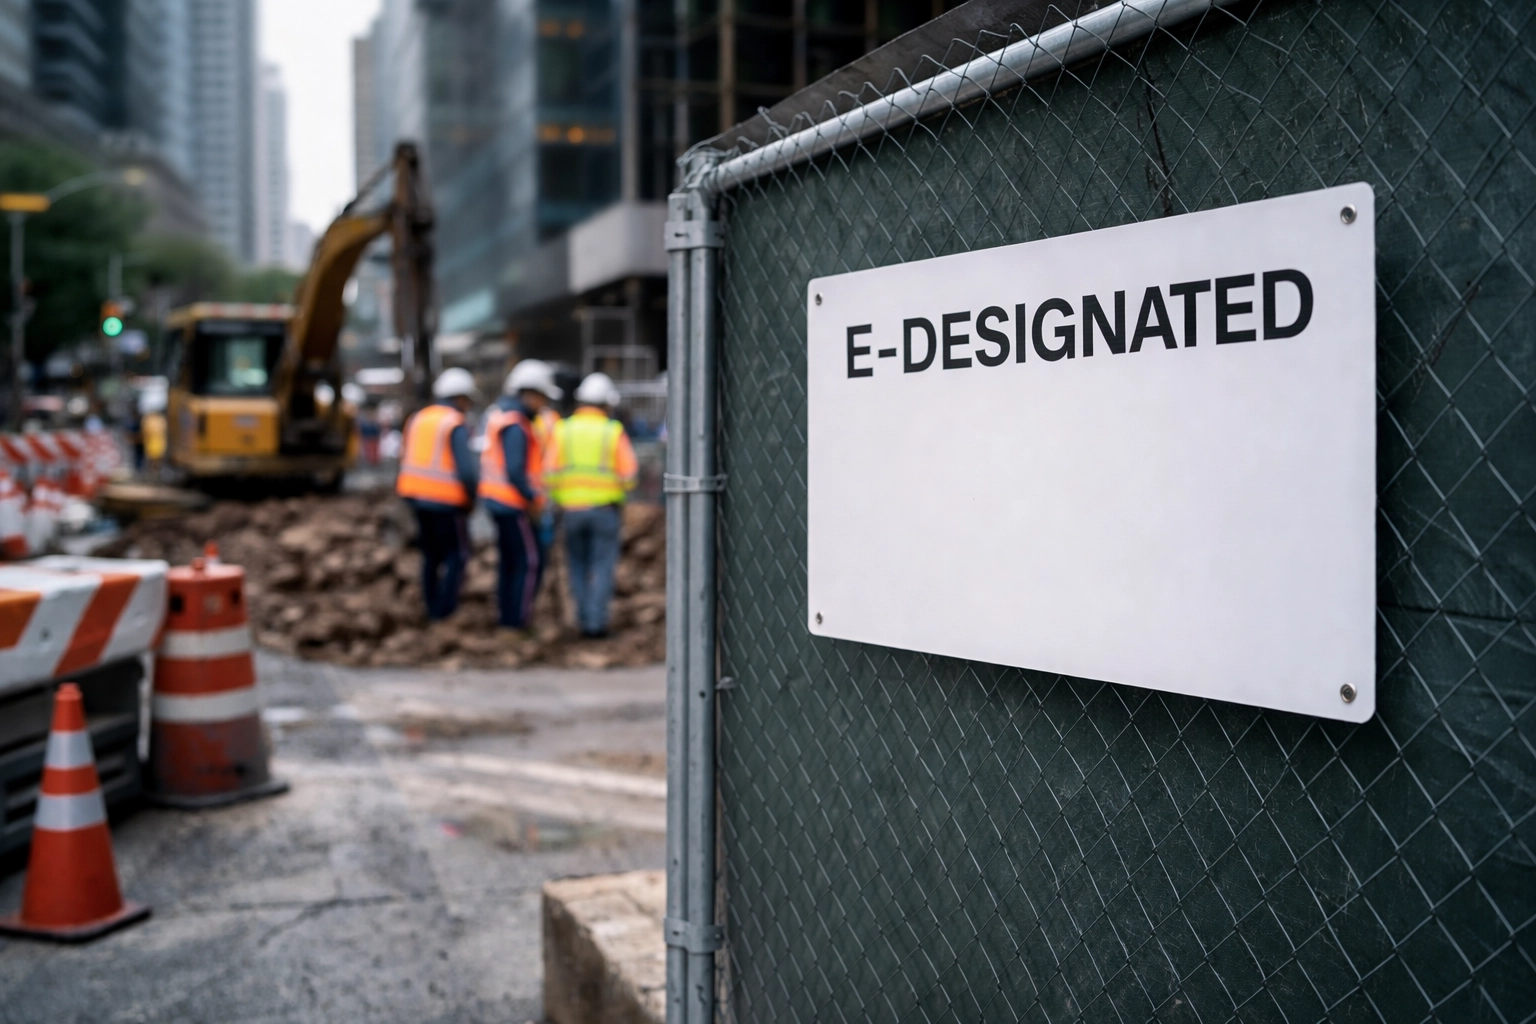
  • NYC OER E-Designation 101: A Beginner's Guide to Clearing Environmental Hurdles

    NYC OER E-Designation 101: A Beginner's Guide to Clearing Environmental Hurdles

    You've found the perfect development site in New York City. The location is ideal, the zoning works, and your financing is coming together. Then your attorney calls with three words that stop everything: "There's an E-Designation."

    If you're new to NYC development, this moment can feel like hitting a wall. But here's the reality: E-Designations are a standard part of doing business in this city. Understanding how to navigate them efficiently is what separates experienced developers from those who watch their project timelines slip by months: or even years.

    This guide breaks down exactly what E-Designations are, why your property might have one, and the step-by-step process for clearing these environmental hurdles so you can get your building permit and move forward.

    What Exactly Is an E-Designation?

    An E-Designation is an environmental requirement that the City of New York places on a property as a condition of a zoning action. Think of it as a regulatory flag that says, "Before you build here, you need to address specific environmental concerns."

    These designations are managed by the Mayor's Office of Environmental Remediation (OER) and exist because the city conducted an environmental review during a rezoning or other land use action and identified potential issues that need resolution before development can proceed.

    The key thing to understand: you cannot obtain a building permit from the Department of Buildings until OER clears your E-Designation. No exceptions, no workarounds.

    Urban Intersection at Dusk

    The Three Types of E-Designations

    Not all E-Designations are created equal. OER manages three distinct categories, and your property might have one, two, or all three:

    Hazardous Materials (Haz Mat)
    This is the most common type we encounter in our work. It requires investigation and, if necessary, remediation of contaminated soil, groundwater, or other hazardous substances on the property. Former gas stations, dry cleaners, manufacturing facilities, and auto repair shops frequently carry these designations.

    Air Quality
    These designations address concerns about air emissions or ventilation requirements. Your building may need specific HVAC configurations or stack heights to ensure air quality standards are met for future occupants and the surrounding community.

    Noise
    Properties near highways, rail lines, airports, or industrial uses often have noise designations. These require you to incorporate specific building materials, window specifications, or other noise attenuation measures into your design.

    Each designation type has its own documentation requirements and review process, which is why understanding exactly what you're dealing with is the critical first step.

    When Do You Need OER Approval?

    Here's where developers sometimes get caught off guard. OER approval isn't just required for ground-up new construction. You need to clear your E-Designation before the Department of Buildings will issue a work permit for:

    • New development or complete redevelopment
    • Expansion or enlargement of an existing structure
    • Change in property use (even without physical construction)
    • Alterations involving ventilation, exhaust, windows, or exterior walls (for noise designations)
    • Any work that disturbs soil (for hazardous materials designations)

    That last point is crucial. If your property has a Haz Mat E-Designation, even minor sitework that involves digging can trigger the full OER review process. We've seen projects delayed because owners assumed a small addition wouldn't require E-Designation clearance.

    Excavator and Crew at Urban Redevelopment Site

    The Step-by-Step Process for Clearing E-Designations

    Let's walk through the actual process. While timelines vary based on complexity, understanding each phase helps you plan realistically and avoid common delays.

    Step 1: Determine Your Requirements

    Your first move is confirming exactly what E-Designation(s) apply to your property and what documentation OER requires. For hazardous materials designations, this typically includes:

    • Phase I Environmental Site Assessment – A records review and site reconnaissance to identify potential contamination concerns
    • Phase II Subsurface Investigation – Actual soil and groundwater sampling to confirm or rule out contamination (required if the Phase I identifies recognized environmental conditions)
    • Remedial Action Work Plan (RAWP) – Your detailed plan for addressing any contamination found
    • Construction Health and Safety Plan – Protocols for protecting workers during construction

    For air quality or noise designations, you'll need a Remedial Action Plan with architectural drawings, testing reports, and specifications for the mitigation measures you'll incorporate.

    All documents must be prepared by qualified environmental professionals and submitted digitally through OER's established process.

    Step 2: Conduct Your Environmental Assessment

    For Haz Mat designations, this is where the Phase I and Phase II ESA work happens. The Phase I establishes the property's environmental history: what businesses operated there, what chemicals they may have used, and whether there are indicators of contamination.

    If the Phase I identifies concerns (which it often does for E-Designated properties), you'll proceed to a Phase II investigation with actual sampling. This tells you definitively what's in the ground and at what concentrations.

    "The Phase I and Phase II process is really about eliminating uncertainty," as we often explain to our clients. "You can't develop an effective remediation plan: or an accurate project budget: until you know exactly what you're dealing with."

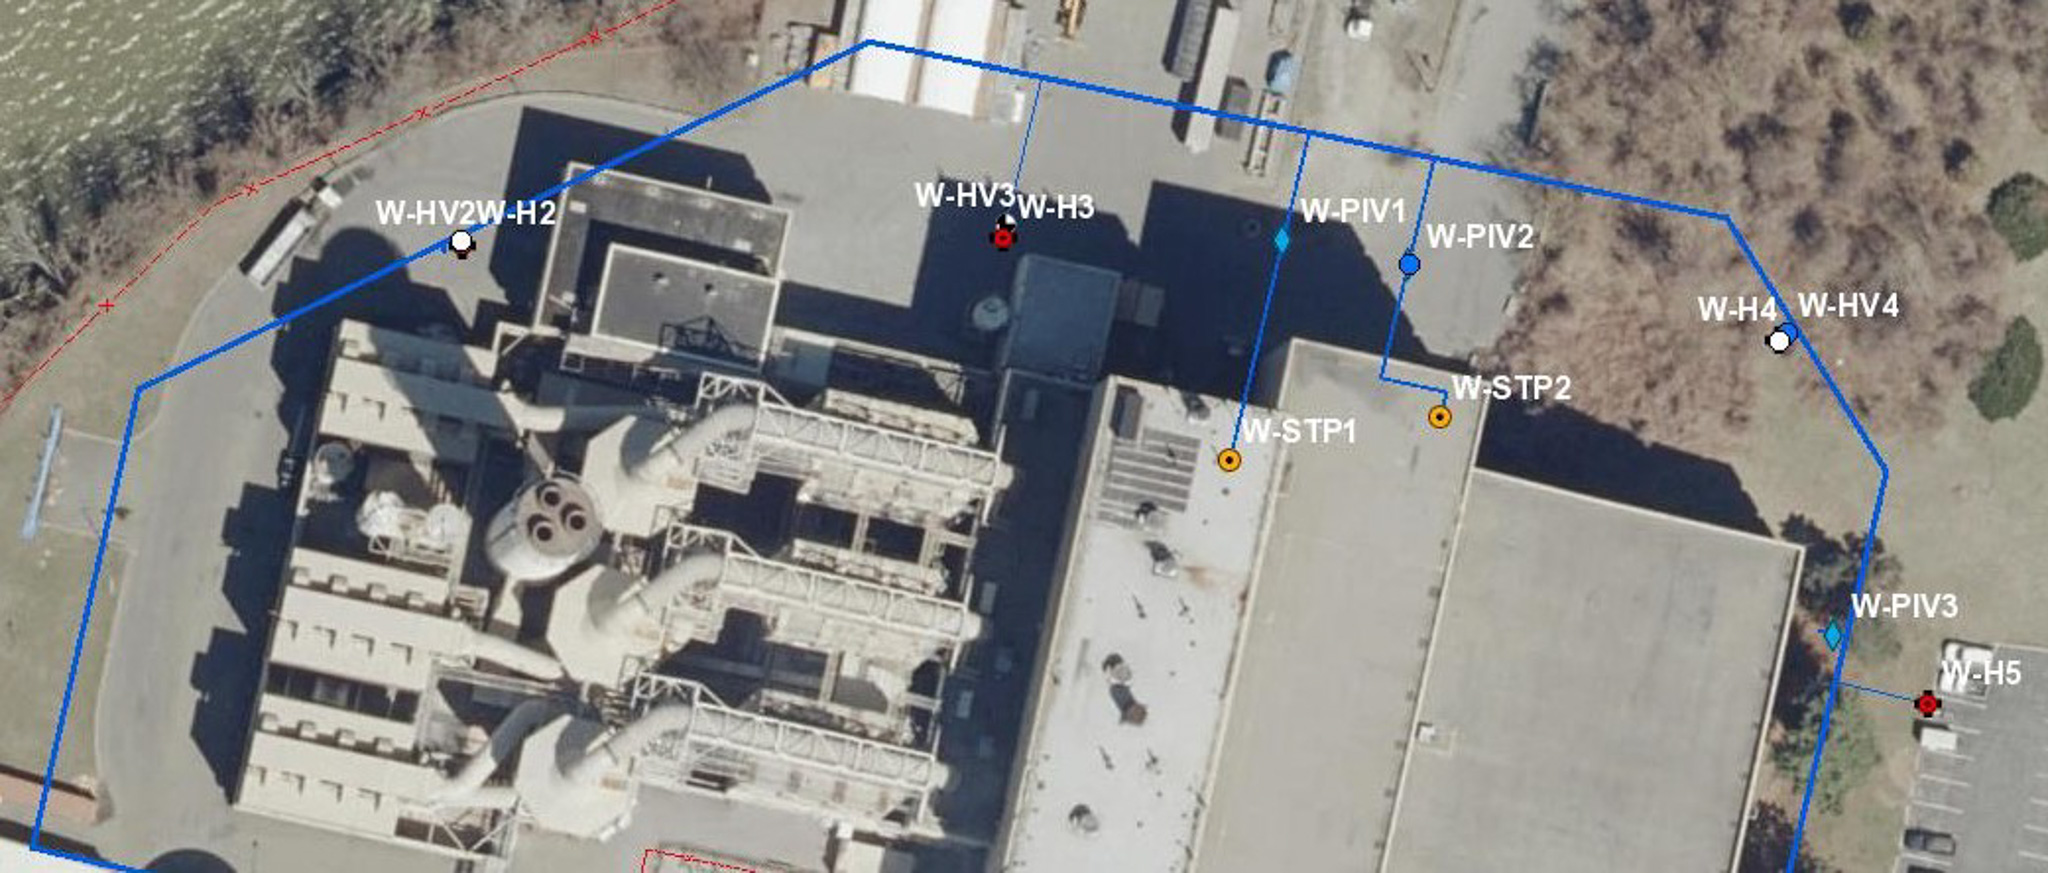
    Aerial View with Monitoring Locations

    Step 3: Submit to OER and Respond to Comments

    Once your documentation is complete, you submit everything to OER for review. By rule, OER will provide written comments within 30 days of receipt.

    Here's where experienced guidance pays dividends. OER reviewers know these regulations inside and out. Incomplete submissions, unclear remediation approaches, or documentation that doesn't address their specific concerns will result in comment letters requesting additional information: and each round of comments restarts the 30-day clock.

    We've found that submissions prepared with OER's expectations in mind move through review significantly faster than those that treat this as a generic regulatory checkbox.

    Step 4: Complete Remediation and Document Everything

    After OER approves your plans, you implement the remediation. For hazardous materials, this might involve soil removal, installation of vapor barriers, groundwater treatment, or other measures depending on what contamination exists.

    Documentation during this phase is critical. You'll need to submit a Remedial Action Report (RAR) certified by a New York Professional Engineer and Qualified Environmental Professional. This report documents everything: what work was performed, what materials were removed, confirmation sampling results, and as-built figures showing exactly what was installed and where.

    Step 5: Receive Your Notice of Satisfaction

    Upon reviewing your RAR and confirming all requirements are met, OER issues a Notice of Satisfaction (for hazardous materials) or Notice of No Objection (for air quality or noise). This document goes directly to the Department of Buildings, clearing the way for your building permit or Certificate of Occupancy.

    Active construction site

    Common Pitfalls and How to Avoid Them

    After guiding numerous projects through E-Designation clearance, we've identified the mistakes that cost developers time and money:

    Underestimating the timeline. The 30-day review periods sound manageable, but the total process: from initial Phase I through Notice of Satisfaction: typically takes 4-8 months for straightforward sites and longer for complex contamination. Build this into your project schedule from day one.

    Skimping on the Phase II investigation. Insufficient sampling during the Phase II often leads to surprises during construction: and OER will require you to address any newly discovered contamination before proceeding. A thorough upfront investigation is always more cost-effective than mid-construction delays.

    Treating OER submissions as an afterthought. Generic environmental reports that don't specifically address E-Designation requirements generate comment letters and delays. Work with professionals who understand exactly what OER needs to see.

    Forgetting about deed restrictions. Some remediation approaches result in ongoing requirements recorded against the property: institutional controls that restrict future use or require long-term monitoring. Understand these implications before finalizing your remediation approach.

    Key Takeaways

    E-Designations are a fact of life for NYC development, but they don't have to derail your project. Here's what matters:

    • Know what you're dealing with – Confirm your specific designation type(s) and requirements early
    • Invest in thorough environmental assessment – The Phase I/II process is your foundation for everything that follows
    • Work with professionals who know OER – Experience with the agency's expectations and procedures directly impacts your timeline
    • Plan realistically – Build E-Designation clearance time into your project schedule before you commit to financing or construction timelines

    At Envicon Strategic Solutions, we've helped developers across New York City navigate E-Designations efficiently: from initial Phase I assessment through final Notice of Satisfaction. The environmental hurdles are real, but with the right approach, they're absolutely clearable.

    Your site's potential is waiting. Let's clear the path to get there.

  • 2026 Phase I ESA Cost Guide: What NY/NJ Developers Should Actually Budget

    2026 Phase I ESA Cost Guide: What NY/NJ Developers Should Actually Budget

    Let's cut to the chase: if you're acquiring or developing property in New York or New Jersey, you need a Phase I Environmental Site Assessment. Your lender requires it. Your investors expect it. And frankly, you should want it: because discovering contamination after you close is a nightmare no one needs.

    But here's where things get murky. Search "Phase I ESA cost" and you'll find numbers all over the map. National averages that don't apply to the tristate. Vague ranges that could mean anything. Marketing fluff that hides the real picture.

    We're going to fix that. This is the transparent breakdown of what Phase I ESAs actually cost in NY/NJ in 2026: and what drives those numbers up or down.

    The Baseline: What Phase I ESAs Cost in 2026

    Nationally, Phase I ESA costs range from $2,000 to $5,000. But if you're working in the NY/NJ market, plan for the higher end of that spectrum.

    Here's why: our region is older, denser, and more industrially complex than most of the country. That former warehouse in Newark? It might have been a dry cleaner, a gas station, and a machine shop across its lifetime. Researching that history takes time. Time costs money.

    Typical 2026 cost ranges for NY/NJ properties:

    Property Type Expected Cost Range
    Small commercial / retail $2,500 – $3,500
    Standard multi-building complex $3,500 – $6,000+
    Industrial or warehouse $3,000 – $6,000+
    Large or complex urban sites $4,000 – $6,000+

    For most standard commercial acquisitions in our market, budget $2,500 to $4,000 for a quality Phase I ESA.

    Aerial site map overlay

    What Actually Drives Phase I ESA Costs in NY/NJ

    Understanding what affects pricing helps you anticipate costs before you get quotes. Here are the factors that move the needle:

    Historical Complexity

    A property in Midtown Manhattan that's been office space since 1960? Relatively straightforward. A Jersey City industrial parcel with five previous owners and three different uses? That's a different story.

    Urban properties in our region often have layered histories: manufacturing, storage, fuel handling, commercial operations. Each historical use requires documentation, database searches, and analysis. More complexity equals more time equals higher cost.

    Site Size and Configuration

    A 10,000 square-foot retail pad gets assessed differently than a 5-acre industrial campus with multiple structures. Larger sites require more reconnaissance time, more interviews, and more thorough documentation.

    Regulatory Requirements

    New York and New Jersey both have state-specific environmental requirements that go beyond the federal ASTM E1527-21 standard. Depending on your property's location and intended use, you may need additional documentation to satisfy NYSDEC or NJDEP requirements. This can add $200 to $500 to your assessment.

    Consultant Expertise

    Here's something the industry doesn't talk about enough: not all Phase I ESAs are equal. A cut-rate assessment might check the boxes, but it may not catch the nuances that matter: especially for properties with industrial history or complex permitting needs.

    "The cheapest Phase I ESA is almost never the best value. We've seen developers spend months: and tens of thousands of dollars: cleaning up issues that a thorough initial assessment would have flagged."

    The Hidden Costs Developers Forget to Budget

    The base Phase I ESA cost is just one line item. Smart developers budget for the full picture:

    Rush Fees

    Standard turnaround for a Phase I ESA is 3-4 weeks. Need it faster? Expect to pay for it.

    • Expedited (10 business days): Add 25-50% to base cost
    • Rush (5 business days): Add 50-100% to base cost

    If your deal timeline is tight, factor this in from day one. We've seen too many developers scramble at the last minute and pay premium fees that could have been avoided with better planning.

    Complex Historical Research

    Some properties require deeper dives into historical records: Sanborn maps, city directories, aerial photographs going back decades. If your site has a complicated past, budget an additional $500 or more for comprehensive historical research.

    Phase II ESA (If Issues Are Found)

    This is the big one. A Phase I ESA is a records review and site reconnaissance: it identifies potential contamination. If recognized environmental conditions (RECs) are identified, you'll likely need a Phase II ESA to actually test soil, groundwater, or soil vapor.

    Phase II ESA costs in NY/NJ typically range from $5,000 to $20,000+, depending on the scope of investigation required.

    Excavator and Crew at Urban Redevelopment Site

    Not every Phase I leads to a Phase II. But if you're acquiring industrial property, former gas station sites, or anything with manufacturing history, build contingency into your budget.

    The Lender-Ready Checklist

    Your Phase I ESA needs to satisfy your lender's requirements, not just check a box. Here's what lenders typically look for:

    • ASTM E1527-21 compliance (the current standard as of 2026)
    • 180-day validity from report date to transaction close
    • Clear identification of RECs, CRECs, and HRECs
    • Qualified Environmental Professional (EP) signature
    • User questionnaire completion documenting your knowledge of the property

    If your report is missing any of these elements, you may face delays at closing. When you're selecting a consultant, confirm their reports meet current ASTM standards and include all required documentation.

    How to Budget Smart: Our Recommendations

    Based on our experience with hundreds of environmental assessments across NY/NJ, here's how we advise developers to approach Phase I budgeting:

    For Standard Commercial Acquisitions

    Budget $3,000-$4,000 for the Phase I ESA, with an additional $5,000-$10,000 contingency for potential Phase II work.

    For Industrial or Brownfield Properties

    Budget $4,000-$6,000 for Phase I, with $15,000-$25,000 contingency for Phase II and preliminary remediation planning.

    For Complex Multi-Parcel Deals

    Request a custom scope and quote. Cookie-cutter pricing doesn't work for portfolio acquisitions or large-scale redevelopment sites.

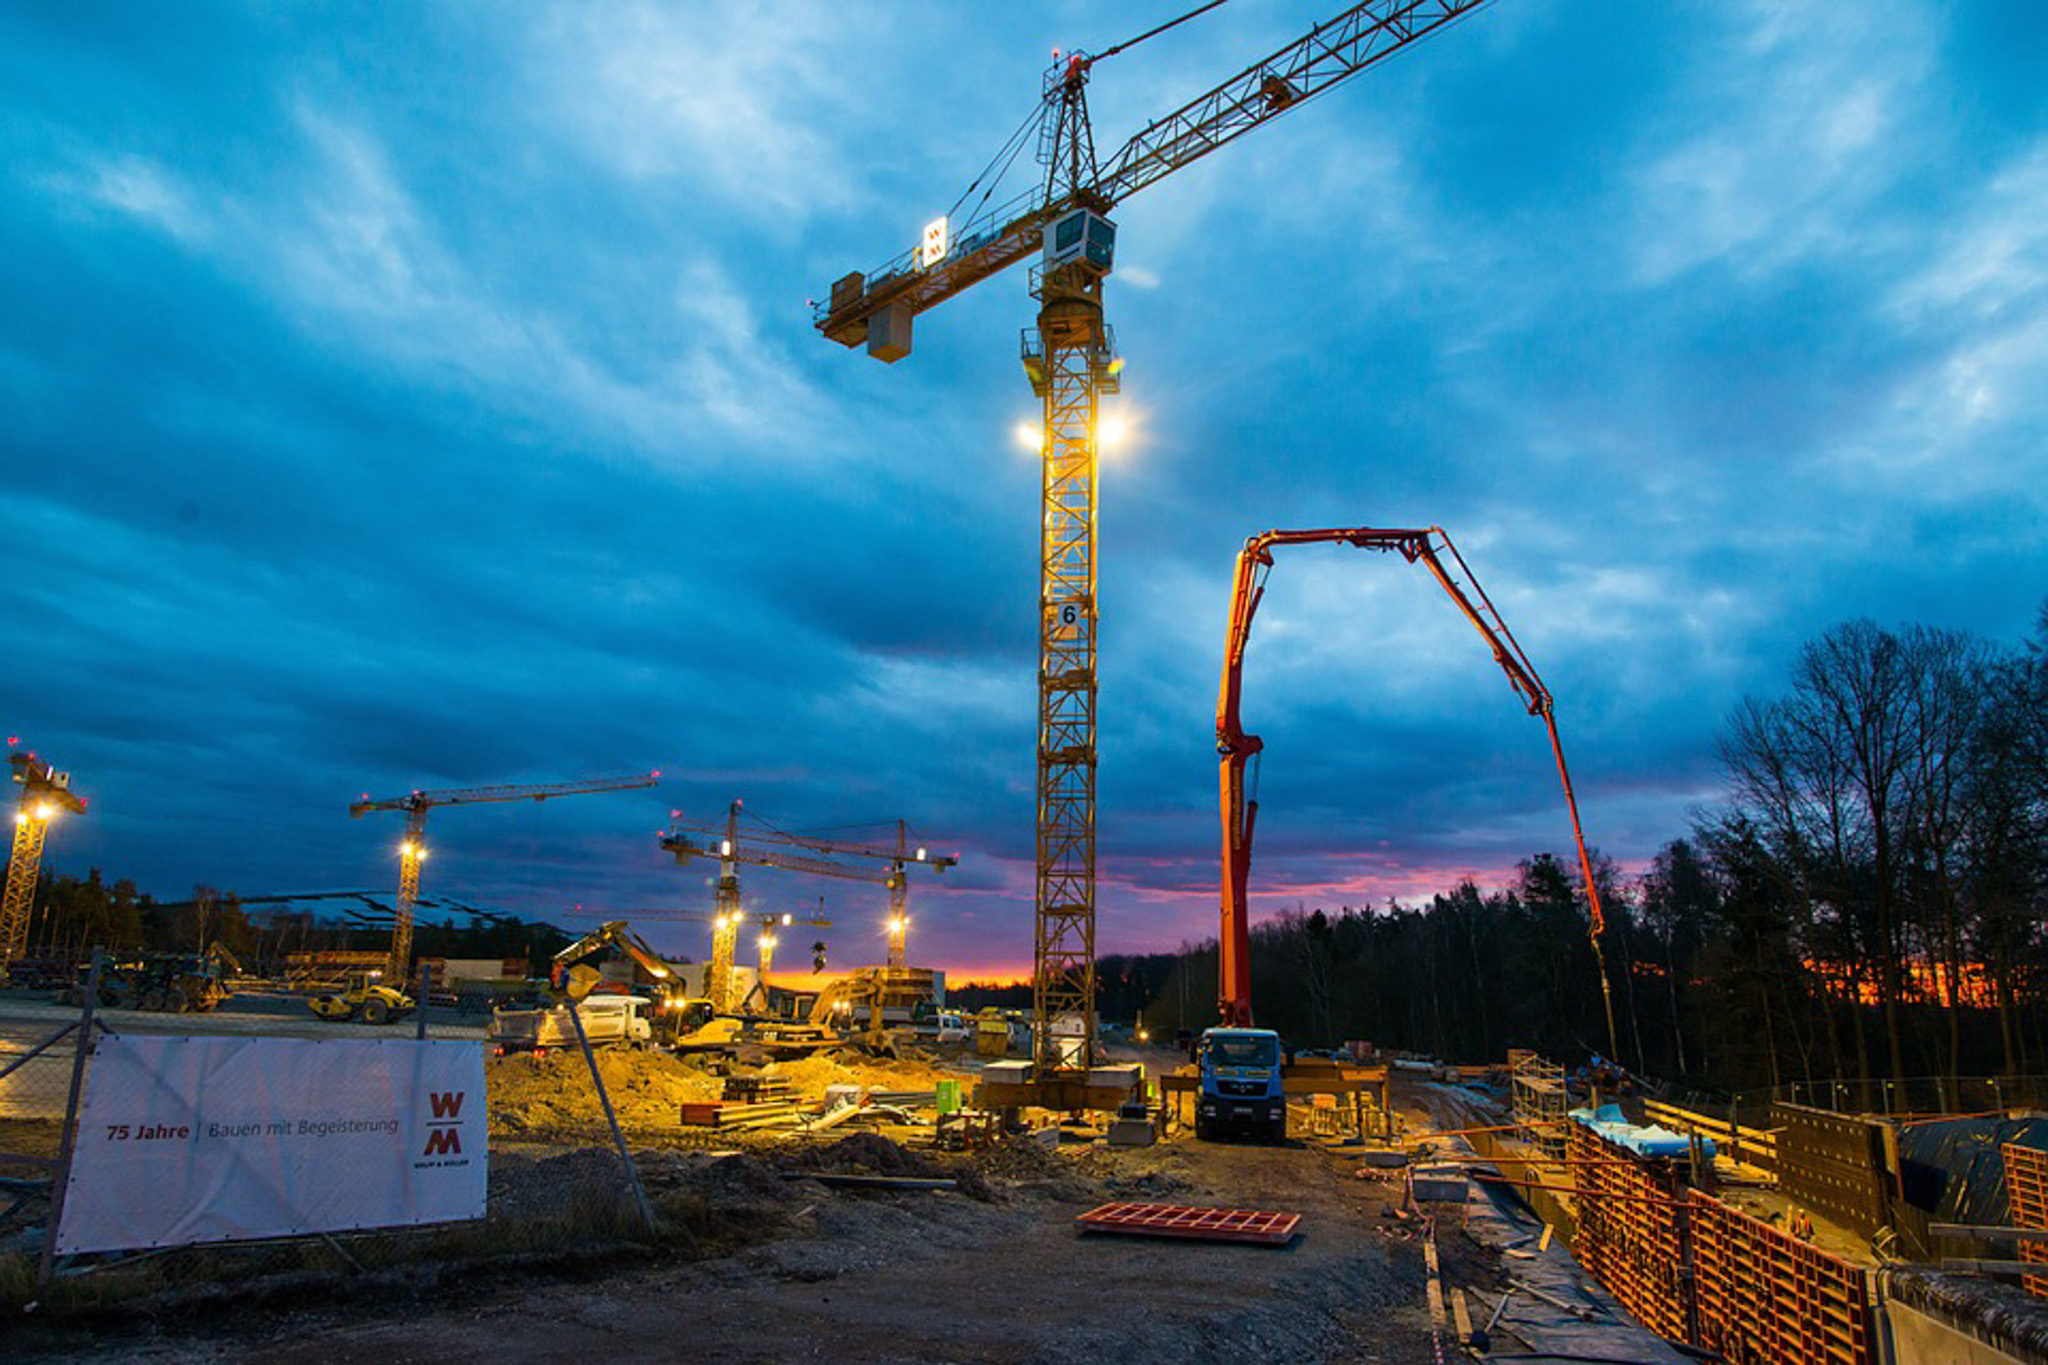
    Active construction site at dusk

    Get Detailed Quotes Upfront

    Don't accept a single number without understanding what's included. Ask consultants to break down their pricing and explain what would trigger additional costs. A reputable firm will be transparent about their fee structure.

    Why Cutting Corners Costs More

    We'll be direct: the Phase I ESA is not the place to minimize spending.

    A thorough assessment protects you from inheriting environmental liability, satisfies your lender, and gives you leverage in negotiations if issues are found. A cheap assessment that misses something? That can cost you six figures in remediation: or kill your deal entirely.

    "Environmental due diligence isn't an expense. It's insurance against the unknown. In a market as complex as NY/NJ, that insurance needs to be comprehensive."

    The consultants who understand NY/NJ's regulatory landscape, historical industrial patterns, and lender expectations deliver value that goes far beyond the report itself. They help you anticipate problems, structure deals appropriately, and move forward with confidence.

    The Bottom Line

    For NY/NJ developers in 2026, here's your Phase I ESA budgeting framework:

    • Standard commercial property: $2,500 – $4,000
    • Industrial or complex sites: $4,000 – $6,000+
    • Rush fees: Add 25-100% depending on timeline
    • Phase II contingency: $5,000 – $20,000+

    Build these numbers into your acquisition pro forma from the start. Account for the possibility of Phase II work on any property with industrial history. And choose your consultant based on expertise and thoroughness: not just price.

    At Envicon, we've built our environmental services practice around one principle: giving developers the clear, accurate information they need to make smart decisions. No surprises. No hidden costs. Just the expertise to move your project forward.

    Ready to get a realistic quote for your next acquisition? Let's talk specifics.

  • Why Your NYC Infill Project Needs a Geotechnical Investigation Before You Dig

    Why Your NYC Infill Project Needs a Geotechnical Investigation Before You Dig

    You've locked down your infill site in Brooklyn. The zoning works, the financing is lined up, and the architect is ready to finalize foundation drawings. Then your contractor asks a simple question: "What's actually under there?"

    If you can't answer that question with hard data, you're not ready to break ground.

    NYC infill development is a high-stakes game. You're building on land that's been used, reused, and sometimes abused for over a century. Former gas stations, industrial facilities, demolished structures with abandoned foundations: the city's subsurface is a patchwork of unknowns. A geotechnical investigation isn't just a box to check. It's the only way to understand what you're building on before your budget and timeline go sideways.

    What a Geotechnical Investigation Actually Tells You

    A geotechnical investigation is a systematic analysis of subsurface conditions at your project site. Through soil borings, test pits, and laboratory analysis, we determine the physical and engineering properties of the ground beneath your feet.

    Specifically, you'll learn:

    • Soil characteristics and classification : Is it fill, native clay, glacial till, or something else entirely?
    • Soil permeability rates : Critical for stormwater management and foundation drainage design
    • Depth to groundwater : Affects excavation methods, dewatering requirements, and foundation type
    • Depth to bedrock : Determines whether you're looking at spread footings, driven piles, or rock-socketed caissons
    • Presence of existing structures or debris : Old foundations, utilities, and buried tanks are common on NYC infill sites

    This data forms the foundation (literally) of every design decision that follows.

    Active construction site

    The Unique Challenges of NYC Infill Sites

    Building on a greenfield site upstate is straightforward. Building on a tight lot in Queens where a warehouse stood for 80 years? That's a different animal entirely.

    NYC infill sites come with a predictable set of complications:

    Historic fill and urban debris. Much of the city's developable land has been filled over time with everything from construction rubble to ash to industrial byproducts. You won't know what you're dealing with until you drill.

    Variable subsurface conditions. Soil conditions can change dramatically across a single lot. We've seen sites where one corner sits on competent rock at 15 feet while the opposite corner has 40 feet of loose fill. Uniform assumptions lead to expensive surprises.

    Existing utilities and abandoned infrastructure. That old building may be gone, but its foundations, fuel tanks, and utility connections might still be waiting underground. Your drilling plan requires utility mark-outs and documentation of every subsurface condition encountered.

    Contamination potential. Former industrial and commercial uses leave their mark. If our investigation encounters debris, odors, ash, petroleum, slag, or other indicators of contamination, drilling stops immediately and the borehole is filled. Early detection protects you from costly remediation and environmental liability down the road.

    "In urban infill development, what you don't know underground will cost you more than what you do know."

    NYC Regulatory Requirements You Can't Ignore

    The City doesn't give you a choice on this one. Geotechnical investigations are mandated before various types of infill work can proceed.

    Stormwater management compliance: If you're proposing a stormwater management practice (SMP) to comply with the NYC DEP Stormwater Construction Permit, an on-site geotechnical investigation is required. The investigation must record soil properties and infiltration rates at minimum: without this data, you cannot design an approvable system.

    Right-of-way green infrastructure: Projects involving city right-of-way green infrastructure require a Limited Geotechnical Investigation prior to design. These investigations must be performed by a licensed Professional Engineer and submitted to the appropriate city agency.

    Building Department submissions: For any foundation work requiring DOB approval, you'll need geotechnical data to support your structural engineer's design. Trying to permit a foundation without subsurface data is a non-starter.

    The regulatory framework exists because the city learned the hard way what happens when people dig first and ask questions later.

    Excavator at Remediation Site

    Contamination: The Risk That Can Kill Your Deal

    Here's where infill sites get genuinely dangerous: not just to your budget, but potentially to your entire project.

    NYC's industrial history means contamination is always a possibility on previously developed land. During a geotechnical investigation, our field teams are trained to watch for warning signs: unusual odors, discolored soil, debris that doesn't belong, petroleum sheens on groundwater, slag, ash deposits, and other red flags.

    When contamination indicators appear, protocol is clear: drilling terminates immediately, the borehole is filled, and the proposed location is abandoned. This isn't overcaution: it's protecting you from turning a routine site investigation into a reportable environmental incident.

    Early contamination detection gives you options. You can adjust your site plan, budget for remediation, or walk away before you're too deep into the deal. Discovering contamination during excavation? That's when projects stall, costs explode, and regulators get involved.

    This is why we often recommend coordinating your geotechnical investigation with a Phase I Environmental Site Assessment. Understanding both the physical and environmental conditions of your subsurface gives you a complete picture before you commit.

    How Geotechnical Data Shapes Your Design

    The investigation isn't just about avoiding problems: it's about designing the right solution for your specific site.

    Foundation selection: Your structural engineer can't specify a foundation system without knowing what's below grade. Spread footings work when you have competent bearing soils near the surface. Deep foundations become necessary when you're building over fill or need to reach bedrock. The geotechnical report tells you which approach makes sense.

    Excavation planning: Depth to groundwater determines whether you need dewatering systems and what excavation support methods are appropriate. Knowing this upfront prevents mid-construction surprises.

    Stormwater design: Infiltration-based stormwater systems only work when soil permeability supports them. If your site has tight clays or high groundwater, your civil engineer needs to design alternatives. The geotechnical data makes this determination possible.

    Cost estimation accuracy: Every foundation system has different cost implications. Designing to actual site conditions: rather than assumptions: means your bids reflect reality.

    Concrete Foundation Footing Construction Site

    The Real Cost of Skipping the Investigation

    We understand the temptation. Geotechnical investigations take time and money, and when you're trying to close on a property or meet a construction deadline, another study feels like another delay.

    But consider what happens when you proceed without data:

    • Foundation redesigns mid-construction when actual conditions don't match assumptions
    • Change orders that blow through contingency budgets
    • Schedule delays while you scramble to address unforeseen conditions
    • Regulatory violations when your stormwater or foundation systems don't meet code
    • Environmental liability when you disturb contamination you didn't know existed

    The cost of a geotechnical investigation is a rounding error compared to the cost of any one of these scenarios. We've seen infill projects lose months and hundreds of thousands of dollars because someone wanted to save a few weeks on the front end.

    "A two-week investigation beats a two-month delay every time."

    How We Approach NYC Infill Investigations

    At Envicon, we've conducted geotechnical investigations across all five boroughs. We understand that NYC infill sites aren't textbook: they require experienced field personnel who know what to look for and how to adapt when conditions change.

    Our approach integrates geotechnical investigation with environmental assessment and civil engineering, so you're not coordinating between three different firms. When we identify a subsurface issue, we can immediately advise on how it affects your environmental compliance, your foundation design, and your project timeline.

    Whether you're developing a mixed-use building in the Bronx, tackling a complicated rezoning site in Queens, or navigating brownfield redevelopment anywhere in the metro area, we bring the integrated expertise your project demands.

    Key Takeaways

    NYC infill development doesn't reward shortcuts. Before you commit to a site, before you finalize foundation designs, and certainly before you mobilize excavation equipment, you need to know what's underground.

    A geotechnical investigation provides:

    • Definitive soil and groundwater data for design
    • Identification of existing structures, utilities, and debris
    • Early warning on contamination before it becomes your problem
    • Regulatory compliance documentation for DEP and DOB submissions
    • Accurate information for cost estimation and scheduling

    The subsurface conditions on your infill site aren't going to change. Your only choice is whether you discover them on your terms or theirs.

    Build smart. Investigate first.

  • SWPPP Compliance in 2026: Avoiding the Most Common NJ/NY Inspection Fines

    SWPPP Compliance in 2026: Avoiding the Most Common NJ/NY Inspection Fines

    Stormwater violations don't announce themselves. They show up as a notice in your inbox, a stop-work order on your gate, or a fine that wipes out your project contingency. In 2026, both New Jersey and New York have sharpened their enforcement focus on Stormwater Pollution Prevention Plans (SWPPPs), and inspectors are no longer giving warnings for what they used to call "minor" issues.

    If you're developing, constructing, or redeveloping a site in the NJ/NY metro, here's what you need to know to keep your project moving: and your budget intact.

    Why SWPPP Enforcement Has Intensified in 2026

    The regulatory landscape has shifted. NJDEP's updated stormwater permit now places explicit emphasis on fining violations of Private Stormwater Management Plans, and inspection/reporting requirements have expanded significantly. New York's State Pollutant Discharge Elimination System (SPDES) general permit for construction activities continues to tighten timelines and documentation standards.

    The message from regulators is clear: stormwater isn't an afterthought. It's a compliance priority with real financial consequences.

    "The days of treating your SWPPP as a binder that sits in the trailer are over. Inspectors want to see active implementation, not just documentation." : Senior Environmental Compliance Manager, NYC Region

    For developers and contractors, this means one thing: proactive compliance is cheaper than reactive fines.

    What Non-Compliance Actually Costs You

    Let's talk numbers. NJDEP can assess penalties up to $50,000 per day for stormwater violations. New York's DEC has similar authority under the Environmental Conservation Law. But the direct fines are only part of the story.

    The real costs of a SWPPP violation include:

    • Stop-work orders that delay your schedule by weeks
    • Re-inspection fees and mandatory corrective action plans
    • Increased scrutiny on future permit applications
    • Lender and investor concerns that can affect financing
    • Reputational damage with municipalities you need for future approvals

    A $10,000 fine can easily balloon into a $100,000 project delay. That's why we tell our clients: the cheapest SWPPP violation is the one you prevent.

    Active Brownfield Redevelopment Site

    The 5 Most Common SWPPP Violations We See in NJ/NY

    After years of supporting construction projects across Hudson County, the Bronx, Queens, and throughout the region, we've seen the same violations come up again and again. Here's what inspectors are flagging most often in 2026:

    1. Inadequate or Missing Inspection Records

    This is the number one issue. Your SWPPP requires regular inspections: typically weekly and after every storm event of 0.25 inches or more. But having a plan isn't enough. You need documented proof that inspections happened, what was observed, and what corrective actions were taken.

    Inspectors aren't just checking if you have a SWPPP. They're checking if you're actually using it.

    2. Failed Erosion and Sediment Controls

    Silt fences that have fallen over. Inlet protection that's clogged and bypassing. Stabilization measures that were never installed on disturbed areas. These visible failures are easy targets for inspectors: and they photograph well in violation reports.

    The 2026 NJDEP permit specifically expands requirements for preventative measures, meaning you need to maintain controls before they fail, not after.

    3. Improper Material Storage and Handling

    Concrete washout areas that aren't contained. Fuel storage without secondary containment. Construction debris piled near storm drains. These are the "low-hanging fruit" violations that inspectors can cite in minutes.

    4. Outdated or Incomplete SWPPP Documentation

    Your SWPPP is a living document. If your site conditions have changed: new phases, altered grading, additional outfalls: your plan needs to reflect that. We regularly see projects get cited because their SWPPP still shows the original site plan from six months ago.

    5. Failure to Train Personnel

    Everyone on your site needs to understand basic stormwater requirements. If an inspector asks your foreman about the location of the concrete washout area and they can't answer, that's a problem. Training records should be part of your compliance file.

    Field Engineer Site Assessment

    NJ-Specific Requirements You Can't Ignore

    New Jersey's updated stormwater permit has added several requirements that catch projects off guard:

    • Enhanced recordkeeping: You must maintain inspection, monitoring, maintenance, and recordkeeping plans that demonstrate ongoing site performance: not just initial compliance.
    • Local ordinance alignment: Your SWPPP must comply with municipal stormwater ordinances, which can be more stringent than state requirements. Don't assume state compliance covers you locally.
    • Private stormwater management plan enforcement: NJDEP has explicitly authorized fining violations of private plans, closing a loophole that some projects previously exploited.

    If you're working in New Jersey, your compliance strategy needs to account for both state and municipal layers. We help clients navigate this through our compliance and permitting services.

    NY-Specific Requirements Worth Noting

    New York's SPDES General Permit for Stormwater Discharges from Construction Activity (GP-0-24-001) has its own set of expectations:

    • Notice of Intent (NOI) timing: You must file your NOI and receive authorization before any soil disturbance begins. Starting work "while the paperwork is processing" is a violation.
    • Qualified inspector requirements: Inspections must be conducted by someone meeting the state's qualified inspector criteria. Not just anyone with a clipboard.
    • Post-construction requirements: Your SWPPP must address long-term stormwater management, not just construction-phase controls.

    For projects in NYC specifically, coordination with DEP and adherence to the city's stormwater management requirements adds another layer. Our teams working on projects like Jerome Ave and throughout the Bronx deal with these overlapping jurisdictions daily.

    Your 2026 SWPPP Compliance Checklist

    Here's what we recommend every project team review before their next inspection:

    Documentation

    • SWPPP is current and reflects actual site conditions
    • Inspection logs are complete with dates, findings, and corrective actions
    • Training records are on file for all site personnel
    • NOI/permit authorization is posted and accessible

    Site Controls

    • All erosion and sediment controls are installed per the plan
    • Controls are maintained and functional (not just present)
    • Stabilization measures are in place on inactive disturbed areas
    • Inlet protection is clear and functioning

    Materials Management

    • Concrete washout area is designated and contained
    • Fuel and chemical storage has secondary containment
    • Construction debris is managed away from drainage pathways
    • Waste containers are covered

    Inspection Readiness

    • Designated SWPPP contact is identified and available
    • Site map showing BMP locations is accessible
    • Previous inspection reports are organized and available for review

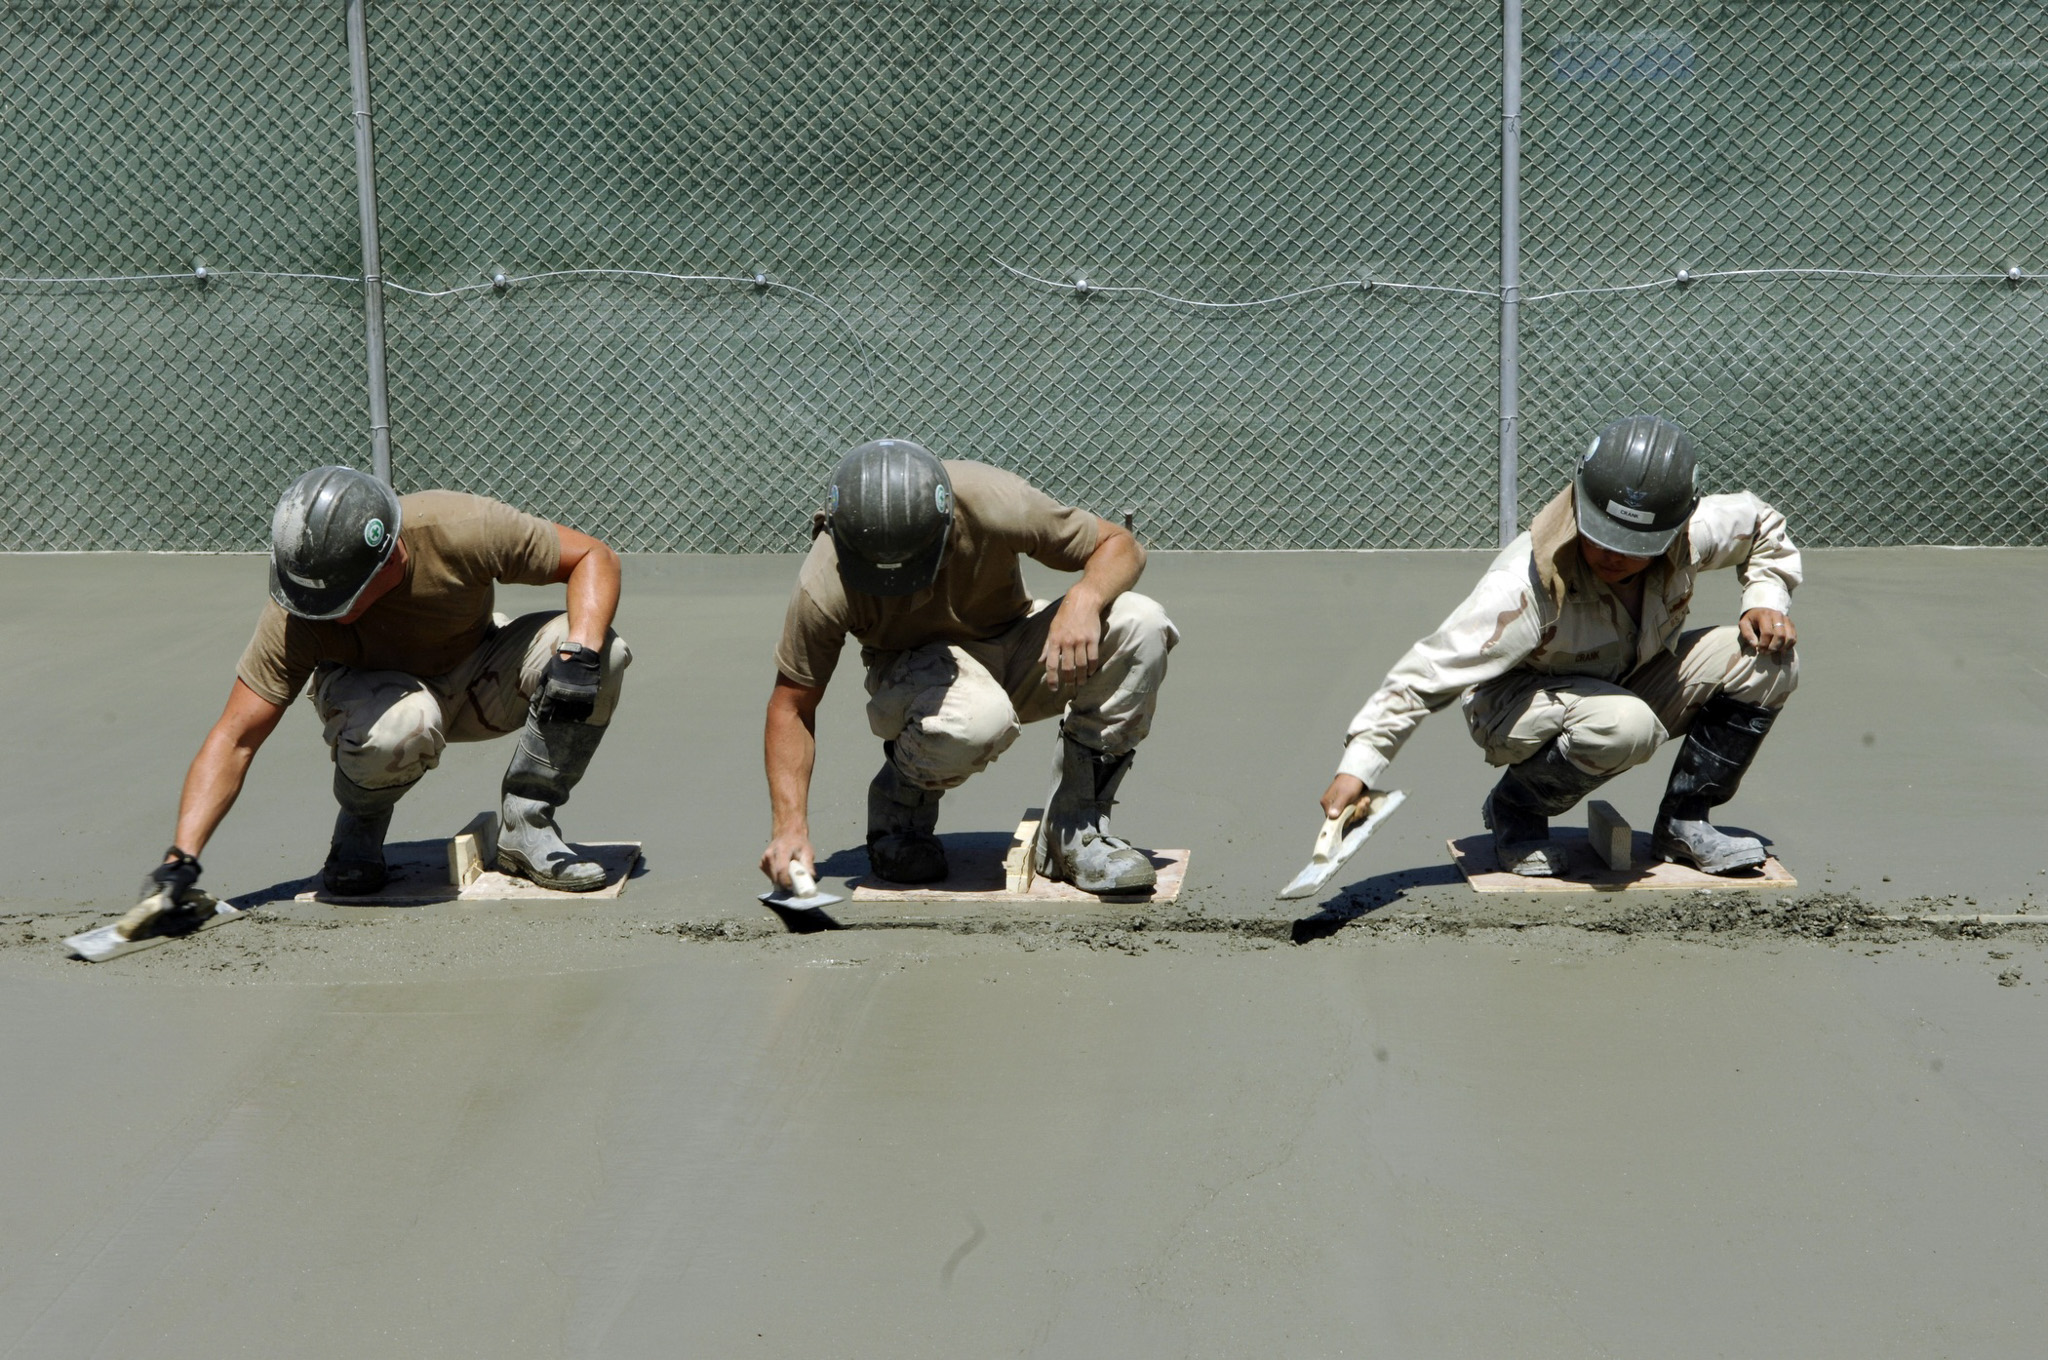
    Construction Workers Smoothing Concrete

    The Bottom Line: Compliance is a Competitive Advantage

    Here's the reality: most of your competitors treat SWPPP compliance as a box to check. They create a plan at permit submission and forget about it until something goes wrong.

    That approach doesn't work in 2026. Regulators have the tools, the authority, and the mandate to enforce stormwater requirements aggressively. Projects that treat compliance as an ongoing operational requirement: not a one-time paperwork exercise: avoid the fines, the delays, and the headaches.

    At Envicon, we integrate environmental compliance with our civil and site engineering work because we've seen what happens when these disciplines operate in silos. Your SWPPP shouldn't be disconnected from your grading plan, your construction sequencing, or your site logistics. When they're aligned, compliance becomes easier: and violations become rare.

    Key Takeaways

    Stormwater compliance in NJ/NY has real teeth in 2026. The most common violations: inspection gaps, failed controls, outdated documentation: are all preventable with the right systems in place. Whether you're breaking ground on a new development or managing an active construction site, the time to audit your SWPPP compliance is now, not after the inspector arrives.

    Need a compliance review before your next inspection? Our team works with developers and contractors across the region to identify gaps and implement practical solutions that keep projects on schedule. Reach out to Envicon to talk through your specific situation.

  • Green Remediation Vs. Traditional Cleanup: Which Approach Actually Saves You Money on Brownfield Projects?

    Green Remediation Vs. Traditional Cleanup: Which Approach Actually Saves You Money on Brownfield Projects?

    When you're staring down a brownfield redevelopment project, the cleanup approach you choose can make or break your budget. After analyzing dozens of remediation projects across the NY/NJ metro area, we've seen one thing consistently: green remediation approaches typically deliver 30-50% cost savings compared to traditional dig-and-haul methods.

    The numbers don't lie. A recent brownfield project in Chicago demonstrated this financial advantage by applying green remediation best practices and reduced the originally estimated cleanup cost by nearly 50 percent through minimized soil excavation and disposal. But here's what most developers don't realize: the savings go far beyond just the upfront cleanup costs.

    The True Cost Breakdown: Green vs. Traditional

    Traditional Cleanup: The Hidden Expense Trap

    Traditional remediation follows a predictable: and expensive: pattern. You excavate contaminated soil, haul it to permitted disposal facilities, backfill with clean material, and monitor the site. While straightforward, this "dig-and-haul" approach racks up costs in multiple areas:

    • Heavy equipment operation: Excavators, dump trucks, and support machinery running for weeks or months
    • Disposal fees: $50-200 per ton for contaminated soil disposal at permitted facilities
    • Transportation costs: Fuel and trucking expenses that can exceed $30,000 for a single project
    • Clean backfill: Purchasing and importing clean soil to replace excavated material
    • Extended timelines: Equipment rental and labor costs compound over longer project durations

    Excavator and Crew at Urban Redevelopment Site

    Green Remediation: The Smart Money Play

    Green remediation flips this model by treating contamination in-place using natural processes. Bioremediation, one of the most cost-effective green approaches, requires less equipment, labor, and energy because natural organisms degrade contaminants on-site without needing excavation and transport.

    Key cost advantages include:

    • Minimal excavation: Treating soil and groundwater in-place eliminates most trucking and disposal costs
    • Lower energy consumption: Natural treatment processes require significantly less fossil fuel input
    • Reduced labor needs: Once treatment systems are installed, monitoring requirements are typically minimal
    • Shorter equipment rental periods: Less heavy machinery needed for shorter durations

    Other nature-based techniques like phytoremediation (using plants) and mycoremediation (using fungi) are explicitly less expensive and as effective as traditional methods while providing additional environmental benefits.

    Real-World Green Remediation Strategies That Save Money

    In-Situ Bioremediation

    This approach introduces microorganisms or nutrients to stimulate existing bacteria that naturally break down contaminants. We've implemented bioremediation on projects where petroleum hydrocarbons were present, achieving cleanup standards while avoiding the excavation of thousands of cubic yards of soil.

    The process typically involves:

    • Installing monitoring wells and injection points
    • Introducing oxygen, nutrients, or specialized bacteria
    • Regular monitoring to track contaminant reduction
    • Natural attenuation over 6-18 months

    Cost impact: 40-60% less than excavation and disposal for petroleum hydrocarbon sites.

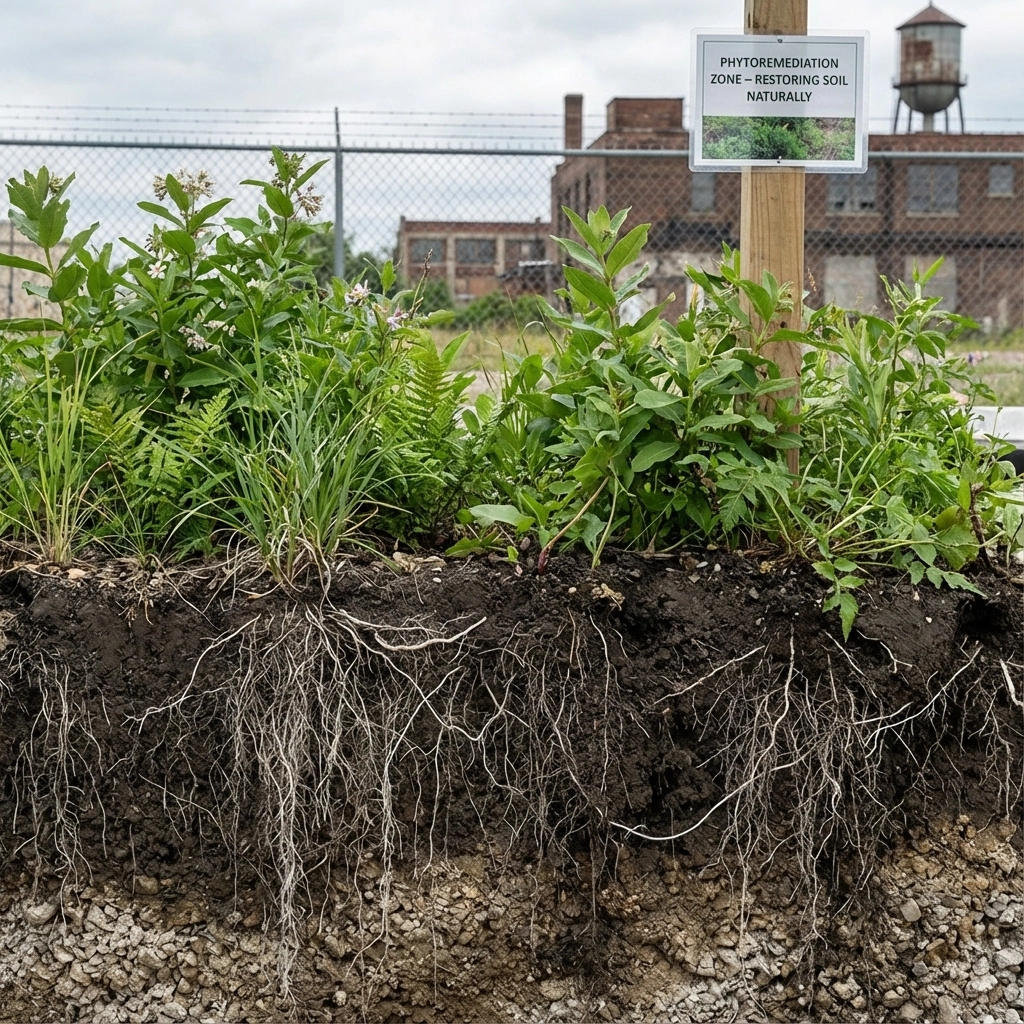
    Phytoremediation Systems

    Native plants can extract, contain, or break down contaminants through their root systems. This approach works particularly well for sites with shallow groundwater contamination or surface soil issues.

    image_1

    Cost impact: Installation costs are minimal compared to traditional approaches, and ongoing maintenance involves standard landscaping activities rather than expensive monitoring systems.

    Environmental Capping with Green Infrastructure

    When complete remediation isn't necessary, environmental caps combined with green infrastructure provide containment while delivering additional site benefits. These systems often include:

    • Permeable surfaces that manage stormwater
    • Native vegetation that requires minimal maintenance
    • Monitoring systems integrated into the cap design

    Environmental caps "will often save money up front" while reducing long-term environmental liability and providing immediate site utilization options.

    When Traditional Cleanup Still Makes Sense

    Green remediation isn't always the most cost-effective approach. Traditional excavation may be your best option when:

    • Immediate site development is required: Green remediation typically requires 6-18 months for treatment
    • Contamination exceeds treatability thresholds: Some contaminant types or concentrations aren't suitable for biological treatment
    • Site conditions prevent in-situ treatment: Limited access or underground utilities may necessitate excavation
    • Regulatory requirements mandate removal: Some regulatory frameworks still require excavation for specific contaminant types

    Aerial View with Monitoring Locations

    The Total Cost of Ownership Calculation

    Smart developers look beyond initial cleanup costs to evaluate total project economics. Green remediation often provides additional financial benefits:

    Energy Cost Savings: Green approaches typically use 30-50% less energy than traditional methods, reducing both costs and carbon footprint.

    Regulatory Compliance: Many green remediation approaches satisfy multiple regulatory requirements simultaneously, reducing permitting costs and timeline delays.

    Site Reuse Flexibility: In-situ treatment preserves site infrastructure and doesn't disrupt existing utilities, reducing redevelopment preparation costs.

    Long-term Monitoring: Biological treatment systems often require less intensive long-term monitoring than traditional approaches, reducing ongoing compliance costs.

    Making the Right Choice for Your NY/NJ Project

    The decision between green and traditional remediation should be based on a comprehensive site evaluation that considers:

    • Contaminant type, concentration, and distribution
    • Site geology and hydrogeology
    • Regulatory framework and cleanup standards
    • Development timeline requirements
    • Total project budget and financing structure

    Our experience across hundreds of NY/NJ brownfield projects shows that sites suitable for green remediation typically achieve 30-50% cost savings while meeting the same cleanup standards as traditional approaches. The key is conducting proper due diligence upfront to match the remediation approach to site conditions and project goals.

    The Bottom Line

    Green remediation isn't just an environmental feel-good strategy: it's smart financial planning. By leveraging natural processes to treat contamination in-place, you can significantly reduce cleanup costs while achieving regulatory compliance and preparing sites for redevelopment.

    The projects that achieve the greatest cost savings combine green remediation approaches with strategic planning that considers the entire development timeline. When you're evaluating your next brownfield opportunity, remember that the cleanup approach you choose today will impact your project economics for years to come.

    Ready to explore whether green remediation makes sense for your brownfield project? Contact our team for a comprehensive site evaluation that considers all remediation options and their financial implications.

  • Environmental Due Diligence for Utility Providers: Solving the Right-of-Way Compliance Puzzle

    Environmental Due Diligence for Utility Providers: Solving the Right-of-Way Compliance Puzzle

    Every utility provider knows the frustration: your transmission line, pipeline, or distribution network needs to cross miles of varied terrain, multiple jurisdictions, and dozens of property parcels. The engineering is complex enough. But the environmental due diligence requirements for right-of-way projects? That's where timelines go to die.

    Right-of-way (ROW) compliance isn't just another checkbox on your project plan. It's a strategic puzzle that, when solved correctly, keeps your infrastructure program on schedule and your legal exposure to a minimum. When handled poorly, it becomes a budget-crushing, schedule-wrecking liability that can stall critical infrastructure for months: or years.

    Here's how utility providers can approach environmental due diligence for ROW projects with the precision and foresight these complex undertakings demand.

    Why Right-of-Way Projects Are Different

    Traditional environmental due diligence focuses on discrete parcels. You assess the site, identify concerns, and move forward. ROW projects break that model entirely.

    Instead of one site, you're dealing with a linear corridor that may stretch across:

    • Multiple municipalities with different zoning requirements
    • Varied land uses (industrial, residential, agricultural, conservation)
    • Wetlands, floodplains, and Waters of the US
    • Properties with unknown contamination histories
    • Culturally sensitive areas requiring Section 106 review

    Each segment of your ROW presents unique environmental constraints. A Phase I Environmental Site Assessment that works for a single commercial property simply doesn't translate to a 15-mile utility corridor crossing three counties.

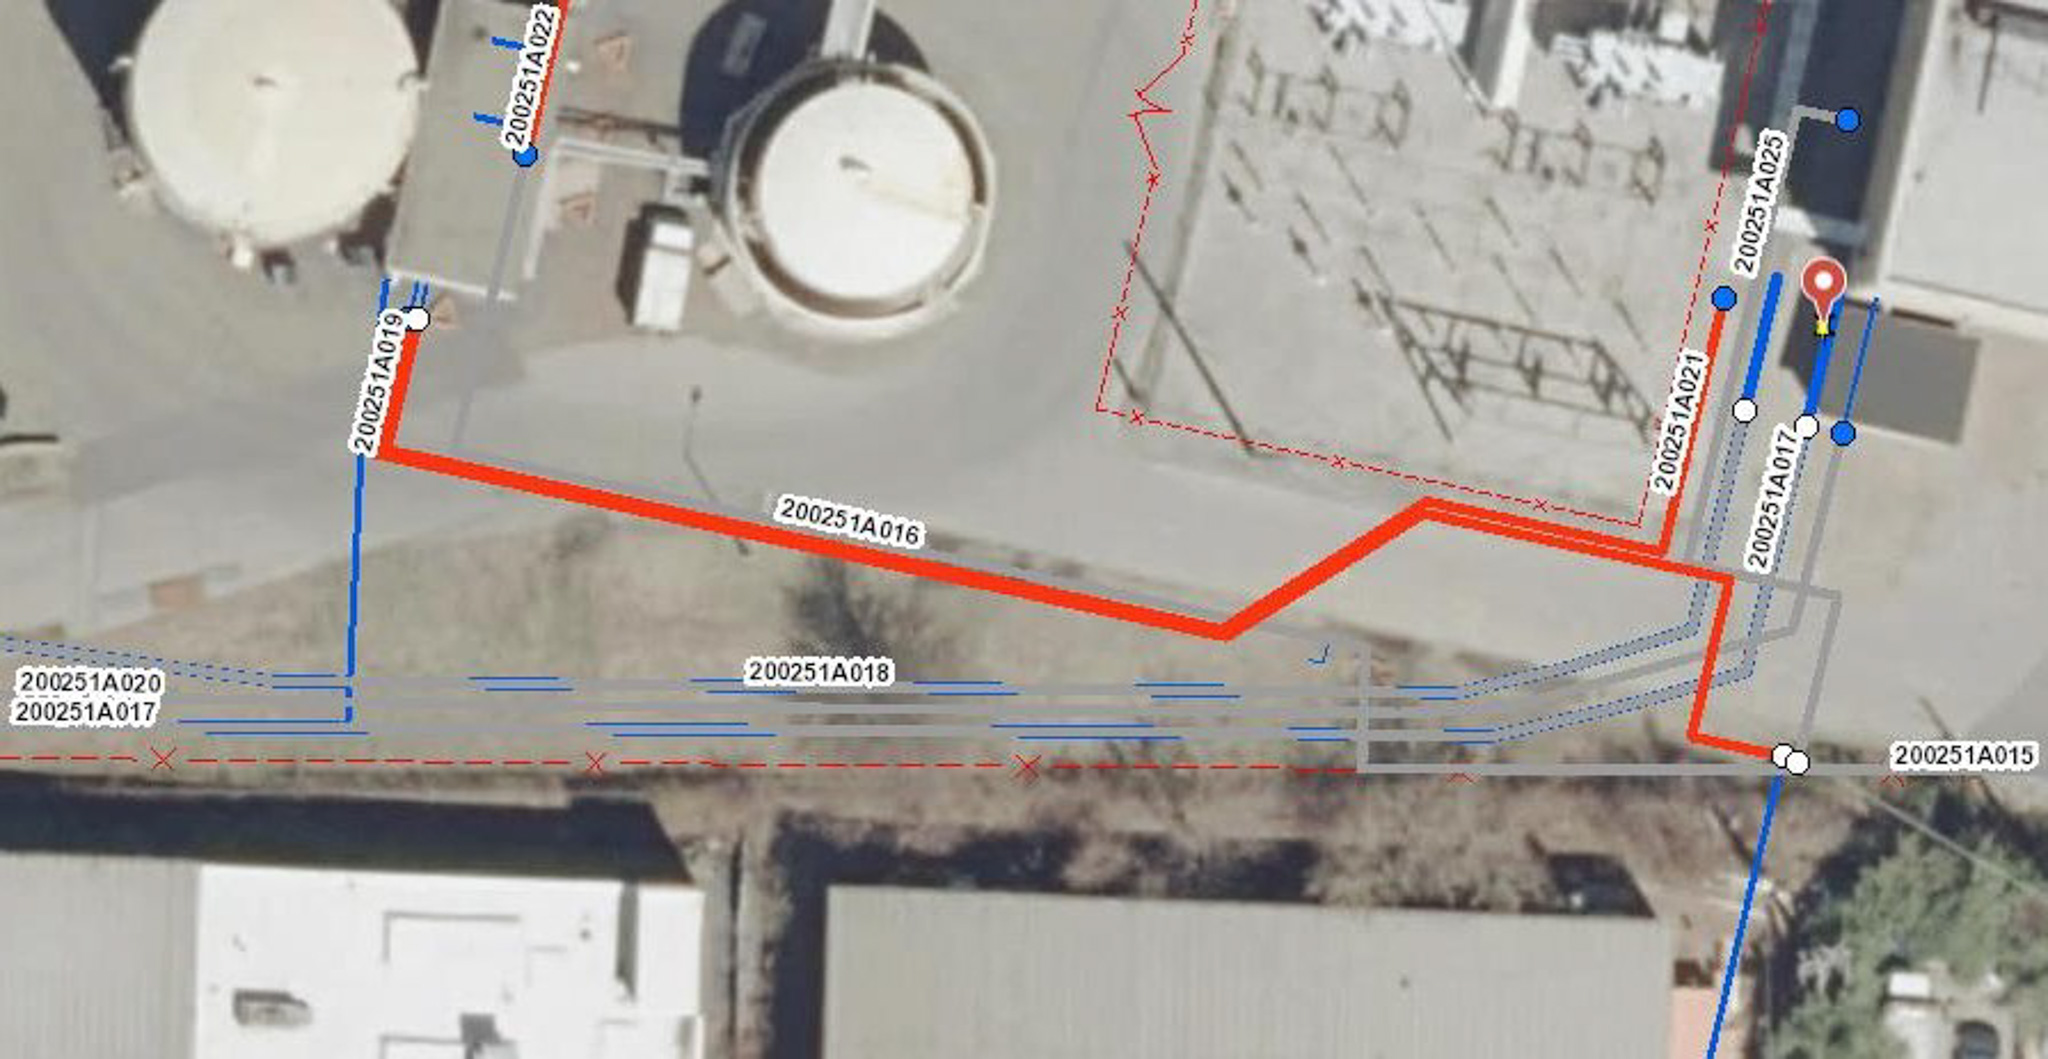
    Aerial Utility Infrastructure Site Map

    The stakes are high. Miss a contaminated parcel in your corridor, and you've just inherited someone else's cleanup liability. Overlook a wetland delineation, and your federal permits get delayed indefinitely. Fail to identify protected species habitat, and your project faces regulatory enforcement actions that make headlines for all the wrong reasons.

    The Core Components of ROW Environmental Due Diligence

    Effective environmental due diligence for utility ROW projects requires a layered approach. We've found that the most successful programs integrate these core components from day one: not as an afterthought when problems emerge.

    Corridor-Wide Phase I ESA Strategy

    Standard Phase I Environmental Site Assessments evaluate individual properties. For ROW projects, you need a corridor-wide strategy that efficiently screens the entire alignment while flagging high-risk segments for deeper investigation.

    This means:

    • Historical aerial photography review spanning the entire corridor length
    • Regulatory database searches calibrated for linear projects (standard search radii don't work well for narrow corridors)
    • Targeted site reconnaissance focused on areas with visible environmental concerns
    • Interviews with knowledgeable parties along the alignment, including adjacent property owners and municipal officials

    The goal isn't to conduct 50 individual Phase I reports. It's to develop a unified environmental risk profile for your entire alignment that identifies where Phase II investigations are truly necessary.

    Constraints and Permitting Analysis

    Before you finalize your route, you need a clear picture of environmental constraints that will affect permitting timelines and costs. This includes wetland and waterway delineations, threatened and endangered species habitat assessments, and cultural resource surveys.

    "During early project planning stages, utility providers should obtain 'will serve' letters from all pertinent utility companies to verify service availability and understand project scope requirements. This proactive approach prevents costly design revisions and budget overruns later in the project lifecycle."

    The same principle applies to environmental constraints. Identify them early, or pay for them later: usually at a much higher cost.

    Aerial View with Monitoring Locations

    Phase II Investigations for High-Risk Segments

    When your Phase I screening identifies recognized environmental conditions along the corridor, targeted Phase II Environmental Site Assessments become necessary. For ROW projects, these investigations need to answer specific questions:

    • What is the nature and extent of contamination?
    • Does it extend into the proposed ROW?
    • Will your construction activities disturb contaminated soil or groundwater?
    • What are the liability implications of proceeding?

    We approach Phase II investigations for ROW projects differently than single-site assessments. The focus is on defining the intersection between contamination and your planned activities: not necessarily characterizing the entire contamination plume on an adjacent property.

    Common Pitfalls That Derail ROW Projects

    After supporting major infrastructure programs across the NY/NJ region, we've seen the same mistakes sink utility ROW projects repeatedly.

    Treating Environmental Due Diligence as a One-Time Event

    ROW projects often span multiple years from planning to construction. Environmental conditions change. Regulations evolve. Properties along your corridor get developed, contaminated, or remediated.

    A Phase I ESA conducted during route selection may be outdated by the time you break ground. Lenders and regulatory agencies expect current assessments: typically within 180 days of transaction or permit application.

    Build environmental due diligence updates into your project timeline. It's far cheaper than discovering a new contamination source during construction.

    Underestimating Agency Coordination Requirements

    Your ROW project likely requires permits from multiple agencies: USACE for wetland impacts, state environmental agencies for waterway crossings, local authorities for zoning compliance. Each agency has different requirements, different timelines, and different tolerance for incomplete applications.

    We've seen utility providers submit permit applications before completing necessary environmental studies, assuming they can provide supplemental information later. This approach almost always backfires. Agencies issue requests for additional information, timelines reset, and projects stall.

    Complete your environmental assessments before engaging with permitting agencies. Walk into those conversations with answers, not questions.

    Ignoring Adjacent Property Conditions

    Your ROW may be clean, but what about the properties you're crossing or bordering? Contamination doesn't respect property boundaries. A leaking underground storage tank on an adjacent industrial site can migrate into your corridor, creating liability exposure you never anticipated.

    Thorough due diligence evaluates not just your ROW, but the environmental conditions surrounding it. This is particularly critical in industrial corridors where legacy contamination is common.

    New Jersey-New York City Major Bridge Aerial View

    Strategic Approaches That Work

    The utility providers who consistently deliver ROW projects on time and on budget share common approaches to environmental due diligence.

    Early Integration of Environmental and Engineering Teams

    When environmental consultants and design engineers work in silos, problems get discovered late: after route selection is finalized, after design is complete, after budgets are locked. That's when environmental issues become expensive change orders.

    Integrate your environmental and engineering teams from the earliest planning stages. Environmental constraints should inform route selection, not react to it.

    Phased Investigation Approach

    Not every segment of your ROW requires the same level of environmental scrutiny. A phased approach concentrates resources where risk is highest:

    1. Desktop screening of the entire corridor using historical records and regulatory databases
    2. Targeted reconnaissance of areas flagged during desktop review
    3. Phase I ESA for segments with identified environmental concerns
    4. Phase II investigation only where recognized environmental conditions warrant

    This approach is both cost-effective and defensible to lenders and regulators.

    Proactive Regulatory Engagement

    Don't wait for agencies to tell you what they need. Engage early with pre-application meetings to understand specific requirements for your project type and location. Regulatory staff can identify potential issues before they become formal objections: and before you've invested significant resources in a flawed approach.

    Our team regularly coordinates with state and federal regulators on behalf of utility clients, translating technical findings into the documentation agencies need to move forward.

    The Bottom Line

    Environmental due diligence for utility ROW projects isn't just about checking boxes or avoiding liability: though it accomplishes both. It's about building the intelligence foundation that allows your infrastructure program to proceed with confidence.

    The utility providers who treat environmental compliance as a strategic advantage, not an administrative burden, are the ones who deliver projects on schedule. They understand that the upfront investment in thorough due diligence pays dividends throughout the project lifecycle: faster permits, fewer surprises during construction, and defensible documentation that protects against future claims.

    Your ROW project is too important to leave environmental compliance to chance. The right partner brings not just technical expertise, but the strategic perspective to navigate the regulatory landscape efficiently. That's the difference between a project that stalls and one that moves forward.

  • Brownfield to ROI: Strategic Remediation Plans That Turn Contaminated Lots Into Market-Ready Assets

    Brownfield to ROI: Strategic Remediation Plans That Turn Contaminated Lots Into Market-Ready Assets

    That contaminated parcel everyone else passed on? It might be the most valuable piece of land in your portfolio: if you know how to approach it.

    In the competitive real estate markets of NYC and Northern New Jersey, the cleanest sites are long gone. What remains are the former gas stations, dry cleaners, industrial facilities, and manufacturing plants that developers have avoided for decades. But here's the reality: brownfield redevelopment isn't just about environmental cleanup. It's about strategic asset conversion that turns liability into leverage.

    The difference between a money pit and a market-ready asset comes down to one thing: your remediation strategy. Get it right, and you unlock value that competitors never see. Get it wrong, and you're burning capital on over-engineered solutions that delay your exit date by years.

    Why Smart Developers Are Chasing "Dirty" Sites

    The math is straightforward. In markets like Hudson County, the Bronx, or Queens, prime developable land commands premium prices: when you can find it at all. Brownfield sites often trade at significant discounts to their uncontaminated neighbors, creating an arbitrage opportunity for developers who understand the remediation process.

    The key insight? Not all contamination is created equal. A site with petroleum impacts from a former heating oil tank requires a fundamentally different approach than one with chlorinated solvents from a dry cleaning operation. Your remediation plan needs to match your contamination profile, your intended use, and your project timeline.

    "The optimal brownfield strategy depends on project goals, market context, and risk tolerance. Brownfield sites can offer superior ROI in strong urban markets, especially when incentives and higher property values outweigh remediation costs."

    We've seen clients acquire contaminated parcels at 40% below market value, execute targeted remediation, and achieve returns that make clean-site developments look pedestrian by comparison.

    Aerial site map with sampling and monitoring locations

    Start With the Investigation: Not the Solution

    The biggest mistake we see? Developers who skip straight to remediation without understanding what they're actually dealing with. A robust Phase II Environmental Site Assessment isn't just a regulatory checkbox: it's the foundation of every cost-effective remediation plan.

    Strategic soil sampling and groundwater investigation tell you:

    • What contaminants are present and at what concentrations
    • Where the contamination is located horizontally and vertically
    • How it's moving through soil and groundwater
    • What the source was and whether it's been removed
    • What regulatory standards apply based on your intended use

    This last point is critical. Residential redevelopment triggers different cleanup standards than commercial or industrial use. A site that requires $2 million in remediation for a residential project might only need $400,000 in work for a commercial development. Your investigation needs to inform your land use strategy, not the other way around.

    Choosing the Right Remediation Approach

    Once you understand your contamination profile, you can select remediation techniques that balance effectiveness, cost, and timeline. The goal isn't necessarily to remove every molecule of contamination: it's to reduce risk to acceptable levels for your intended use while protecting human health and the environment.

    Excavation and Disposal

    The most straightforward approach: dig it up and haul it away. Excavation works best for localized contamination: think underground storage tanks or small spill areas. It's fast and provides regulatory certainty, but costs escalate quickly for larger volumes or deeper contamination. In the NYC metro area, disposal fees alone can run $150-300 per ton depending on contaminant type.

    Capping and Engineering Controls

    Sometimes the smartest move isn't removal: it's isolation. Installing clean soil caps, vapor barriers, or hardscape covers can effectively manage contamination at a fraction of excavation costs. This approach works particularly well when you're developing the site anyway. That parking structure or building slab? It doubles as a containment system.

    In-Situ Treatment

    Chemical oxidation, bioremediation, and other in-place treatments can address contamination without the disruption and expense of excavation. These technologies are especially valuable for groundwater contamination or sites where excavation would destabilize neighboring structures. The tradeoff: treatment timelines often extend 12-24 months or longer.

    Monitored Natural Attenuation

    For certain contaminants, natural processes like biodegradation can reduce concentrations over time. This approach requires patience and ongoing monitoring but can be highly cost-effective for sites where you have timeline flexibility.

    Excavator and Crew at Urban Redevelopment Site

    The LSRP Advantage in New Jersey

    If your brownfield sits in New Jersey, you're operating under the Licensed Site Remediation Professional (LSRP) program. This matters for your bottom line.

    The LSRP program allows qualified professionals to oversee remediation without direct NJDEP case management, dramatically accelerating timelines. Projects that once took 5-7 years under the old system now routinely close in 18-36 months. For developers, that timeline compression translates directly to faster returns.

    But here's what separates good LSRPs from great ones: strategic remediation design. The regulations allow flexibility in how you achieve compliance. An LSRP who understands your development goals can design remediation that integrates with your construction schedule, uses your building as an engineering control, and phases work to match your capital deployment.

    Financial Levers That Maximize ROI

    Smart brownfield developers don't just manage remediation costs: they actively leverage financial incentives that can transform project economics.

    State Brownfield Programs

    Both New York and New Jersey offer substantial incentives for brownfield redevelopment. New Jersey's Brownfield Tax Credit can reimburse up to 75% of eligible remediation costs. New York's Brownfield Cleanup Program provides tax credits tied to site preparation costs and tangible property investments. These aren't minor subsidies: we've seen projects where incentives covered the entire remediation budget with room to spare.

    Environmental Insurance

    Pollution legal liability policies can cap your exposure, satisfy lender requirements, and provide comfort to future buyers or tenants. For sites with residual contamination or ongoing institutional controls, insurance often makes the difference between a financeable project and one that stalls.

    Strategic Land Use Decisions

    Remember: cleanup standards vary by use. Sometimes the highest ROI comes from adjusting your development plan to match the site's contamination profile rather than forcing expensive remediation to enable a predetermined use.

    Aerial View with Monitoring Locations

    Integrating Remediation With Development

    The most cost-effective brownfield projects treat remediation and development as a single integrated process: not sequential activities. This requires coordination between your environmental consultant, civil engineer, and construction team from day one.

    Design decisions that reduce remediation costs:

    • Locating building footprints to avoid the most contaminated areas
    • Using foundation systems that don't penetrate into impacted zones
    • Incorporating vapor mitigation into standard building envelope design
    • Timing excavation to coincide with basement or underground parking construction
    • Using clean fill requirements as an opportunity to improve site grades

    At Envicon, our integrated approach to civil and environmental engineering means these decisions happen at the design table, not as expensive change orders during construction.

    The Path Forward

    Brownfield redevelopment isn't for the faint of heart, but for developers who approach it strategically, contaminated sites offer opportunities that clean parcels simply can't match. The formula is straightforward:

    1. Investigate thoroughly before you commit capital
    2. Match your remediation strategy to your contamination profile and intended use
    3. Leverage every available incentive to offset costs
    4. Integrate remediation with development to eliminate redundant work
    5. Engage experienced advisors who understand both the technical and financial dimensions

    The developers who master this process aren't just cleaning up contaminated sites: they're creating market-ready assets while their competitors fight over the scraps of clean land that remain.

    That abandoned industrial parcel everyone else walked away from? With the right strategy, it's not a liability. It's your competitive advantage.

  • Lender-Ready Phase II ESA Checklist: Avoid These 5 Red Flags in Your Next Loan App

    Lender-Ready Phase II ESA Checklist: Avoid These 5 Red Flags in Your Next Loan App

    You found the perfect property. The numbers work. Your development timeline is tight. Then your lender kicks back your Phase II Environmental Site Assessment with questions, and suddenly, your closing date is slipping further away.

    We see this scenario play out constantly with developers and investors across the NY/NJ market. The Phase II ESA looked complete. The consultant delivered a thick report. But somewhere between the soil borings and the signature page, critical details got missed that make underwriters nervous.

    Here's the reality: lenders aren't environmental experts. They're risk managers. And when your Phase II ESA doesn't clearly communicate risk, or worse, raises more questions than it answers, your loan application hits a wall.

    Let's break down the five red flags that make lenders hesitate and, more importantly, how to avoid them before you even submit your application.

    Red Flag #1: Sampling Locations That Don't Match the Site History

    Every Phase II ESA starts with a Phase I that identifies Recognized Environmental Conditions (RECs). The Phase II is supposed to investigate those specific concerns through targeted soil and groundwater sampling.

    The problem? We routinely review Phase II reports where sampling locations seem almost random. A Phase I identifies a former dry cleaner on the northeast corner of a property, but the Phase II borings are clustered in the center of the site. That disconnect is a red flag lenders notice immediately.

    Aerial View with Monitoring Locations

    What lenders want to see:

    • Clear rationale connecting each sampling location to a specific REC or area of concern
    • A site map showing boring locations overlaid with historical features
    • Explanation of why certain areas were prioritized over others

    When your sampling strategy tells a logical story, underwriters can follow along. When it doesn't, they assume something was missed.

    Red Flag #2: Vague or Missing Data Quality Objectives

    Data Quality Objectives (DQOs) are the technical foundation of any defensible Phase II ESA. They define what you're testing for, why you're testing for it, and what standards you're comparing results against.

    Here's where many reports fall short: they include pages of laboratory data without clearly stating what those numbers mean in context. A soil sample showing 150 mg/kg of lead sounds alarming, until you realize the NJDEP Residential Direct Contact Soil Remediation Standard is 400 mg/kg.

    "Lenders don't want to interpret raw data," says one commercial loan officer we've worked with extensively. "They want conclusions backed by clear regulatory benchmarks."

    What lenders want to see:

    • Explicit identification of applicable regulatory standards (NJDEP, NYSDEC, etc.)
    • Clear comparison tables showing results versus standards
    • Statement of whether contamination exceeds unrestricted use criteria

    Without this framework, your Phase II is just a collection of numbers. With it, you have a decision-making tool.

    Red Flag #3: Contamination Without Boundaries

    Finding contamination isn't necessarily a deal-killer. Plenty of commercial real estate transactions close on properties with known environmental issues. What kills deals is uncertainty about the extent of that contamination.

    Excavator and Crew at Urban Redevelopment Site

    When a Phase II identifies petroleum-impacted soil at one location but doesn't include step-out borings to define the plume boundaries, lenders get nervous. Why? Because undefined contamination means undefined liability, and undefined remediation costs.

    What lenders want to see:

    • Horizontal and vertical delineation of any contamination identified
    • Clear statement of whether contamination is "bounded" or requires additional investigation
    • Preliminary volume estimates if remediation appears necessary

    We've seen transactions close smoothly with significant contamination present, because the Phase II clearly defined the problem and provided enough data to estimate cleanup costs. Conversely, we've seen deals collapse over minor contamination that wasn't properly characterized.

    The difference is delineation.

    Red Flag #4: Conclusions That Don't Address Risk

    Here's where many Phase II reports lose lenders entirely: the conclusions section reads like a technical summary rather than a risk assessment.

    A typical weak conclusion might read: "Soil sampling identified petroleum hydrocarbons exceeding residential soil cleanup criteria at boring B-3."

    That's a finding, not a conclusion. Lenders need to understand: What does this mean for the transaction? What are the potential costs? What are the options moving forward?

    What lenders want to see:

    • Clear risk characterization (low, moderate, high) with supporting rationale
    • Discussion of potential remediation pathways and order-of-magnitude costs
    • Assessment of whether contamination affects the intended use of the property
    • Recommendations for next steps (additional investigation, remediation, or closure)

    Aerial Site Map with Utilities

    At Envicon Strategic Solutions, we structure our Phase II conclusions around a simple question: Does this property represent an acceptable environmental risk for this transaction? Everything in the conclusions section builds toward answering that question clearly.

    Red Flag #5: Documentation Gaps and Chain of Custody Issues

    This red flag is the most avoidable, and the most damaging when it appears. Lenders and their environmental risk consultants review Phase II reports looking for signs of professional rigor. Documentation gaps signal the opposite.

    Common issues we see in competitor reports:

    • Missing or incomplete chain of custody forms
    • Laboratory reports from non-accredited labs
    • Photographs that don't clearly show sampling locations or conditions
    • Field logs with incomplete information about sampling methods
    • Inconsistent boring/well identification between text and figures

    "Documentation issues make us question everything else in the report," notes a risk manager at a regional bank. "If the basics aren't right, how confident can we be in the conclusions?"

    What lenders want to see:

    • Complete chain of custody documentation for all samples
    • Laboratory certifications for all applicable parameters
    • Detailed field logs with sampler identification, methods, and observations
    • Professional photographs documenting site conditions and sampling activities
    • Consistent nomenclature throughout all report sections and appendices

    Construction Crew in Action

    These details might seem administrative, but they're the foundation of a defensible assessment. When documentation is airtight, the entire report carries more weight.

    The Lender-Ready Difference

    So what separates a Phase II ESA that sails through underwriting from one that triggers weeks of back-and-forth?

    It comes down to anticipating the questions lenders will ask, and answering them before they're asked.

    At Envicon, our environmental assessment services are built around lender expectations because we've navigated hundreds of commercial real estate transactions across NYC, New Jersey, and the broader Northeast. We know what makes underwriters comfortable and what keeps them up at night.

    Our lender-ready approach includes:

    • Pre-investigation coordination with your lender's environmental risk team
    • Sampling strategies explicitly tied to Phase I findings
    • Regulatory framework clearly stated upfront
    • Complete delineation of any contamination identified
    • Risk-based conclusions with actionable recommendations
    • Documentation packages that withstand scrutiny

    We also integrate our environmental expertise with civil engineering capabilities, meaning we can speak directly to remediation feasibility, site development constraints, and construction timelines, questions that inevitably arise when contamination is present.

    Key Takeaways for Your Next Transaction

    Before you submit your next Phase II ESA with a loan application, run through this quick checklist:

    • Sampling rationale is clear: Every boring location connects to a specific concern from the Phase I
    • Regulatory standards are stated: Results are compared against applicable criteria with clear pass/fail determinations
    • Contamination is bounded: Any impacts identified are delineated horizontally and vertically
    • Conclusions address risk: The report answers "what does this mean for the deal?" not just "what did we find?"
    • Documentation is complete: Chain of custody, lab certs, field logs, and photos are all present and consistent

    Get these five elements right, and your Phase II becomes an asset in your loan application rather than an obstacle. Get them wrong, and you're looking at delays, additional investigation costs, and potentially a dead deal.

    Your lender isn't trying to kill your transaction. They just need enough information to say yes. A lender-ready Phase II ESA gives them exactly that.

    Ready to discuss your next acquisition? Reach out to our team to ensure your environmental due diligence clears underwriting the first time.

  • Is Your Geotech Report Too Conservative? How Smarter Site Investigations Save Thousands in Foundation Costs

    Is Your Geotech Report Too Conservative? How Smarter Site Investigations Save Thousands in Foundation Costs

    You get the geotechnical report back. The structural engineer reviews it. And suddenly, your foundation budget just ballooned by $75,000.

    The culprit? Recommendations for deep foundations, over-engineered footings, or excessive soil remediation: all based on a report that played it safe rather than played it smart. This scenario happens more often than most developers realize, and it's costing projects real money.

    Here's the thing: a conservative geotechnical report isn't necessarily a bad report. But an overly conservative one? That's a different story entirely. When soil investigation protocols default to worst-case assumptions rather than site-specific realities, you end up paying for foundation systems your project doesn't actually need.

    Let's break down why this happens and what you can do about it.

    Why Geotechnical Reports Default to Conservative

    Geotechnical engineers carry significant liability. If a foundation fails, fingers point directly at the geotech report. This reality creates a professional culture where recommending more robust (read: more expensive) foundation solutions is the safer career move.

    Concrete Foundation Footing Construction Site

    Here's what typically drives overly conservative recommendations:

    • Limited boring locations – When budget constraints reduce the number of test borings, engineers have less data. Less data means more assumptions. More assumptions mean wider safety margins.

    • Generic soil parameters – Some reports rely heavily on published soil tables rather than site-specific lab testing. These tables represent conservative averages, not your actual conditions.

    • One-size-fits-all scoping – Cookie-cutter investigation programs don't account for what you're actually building. A three-story mixed-use building has different foundation demands than a warehouse.

    • Liability protection language – Many reports include boilerplate recommendations that cover every possible scenario, even ones that don't apply to your site.

    As one industry veteran put it: "The cheapest geotech report is often the most expensive foundation." That cuts both ways: skipping proper investigation entirely can cost you $30,000 or more in foundation surprises, but an investigation that doesn't ask the right questions wastes money on the front end and the back end.

    The Real Cost of Over-Engineering

    Let's put numbers to this. A typical geotechnical investigation runs $1,000 to $5,000, with most projects landing around $2,700. That's a modest investment against your total project budget.

    But foundation costs? Those scale dramatically based on what the geotech report recommends.

    Consider the difference between these scenarios:

    Foundation Type Typical Cost Impact
    Spread footings on competent soil Baseline
    Spread footings with over-excavation +15-25%
    Mat foundation (when not needed) +40-60%
    Deep foundations (piles/caissons) +100-300%

    When a report recommends deep foundations based on conservative assumptions rather than confirmed site conditions, you're potentially adding six figures to your project. That's not engineering: that's guesswork with expensive consequences.

    Active construction site

    We've seen projects in the NYC metro area where the original geotech report called for driven piles through 30 feet of "questionable" fill. A more targeted investigation: additional borings, better lab testing, and actual engineering analysis rather than conservative defaults: revealed competent bearing soils at 12 feet. The foundation redesign saved the client over $200,000.

    What a Smarter Site Investigation Looks Like

    The difference between a conservative report and a smart report comes down to investigation design. Here's what separates the two:

    Strategic Boring Locations

    Generic investigations place borings on a grid pattern regardless of where your building loads actually concentrate. A targeted approach puts borings where they matter most: under elevator pits, at column locations, along proposed retaining walls. Better data where it counts means tighter recommendations where it matters.

    Appropriate Testing Depth

    Some investigations drill to arbitrary depths regardless of the structure being built. A single-story retail building doesn't need the same subsurface profile as a 15-story residential tower. Right-sizing the investigation scope to your actual project saves money without sacrificing data quality.

    Site-Specific Lab Testing

    Standard penetration test (SPT) data only tells part of the story. For projects where foundation costs are sensitive, investing in lab testing: consolidation tests, direct shear, unconfined compression: provides actual soil strength parameters rather than conservative estimates from correlation tables.

    Excavator at Remediation Site

    Historical Context

    In developed areas like Northern New Jersey and New York City, most sites have history. Previous investigations, construction records, and adjacent project data can inform your investigation scope. Why drill blind when neighboring buildings already proved the subsurface conditions?

    Questions to Ask Before Your Next Investigation

    Before you sign off on a geotech proposal, push back with these questions:

    • "How did you determine the boring locations?" If the answer is "standard practice" rather than "based on your building layout," that's a red flag.

    • "What assumptions will you make if we encounter variable conditions?" Understanding the engineer's default position helps you anticipate conservative creep.

    • "Can we phase the investigation?" Sometimes a preliminary investigation with targeted follow-up borings delivers better data at lower total cost than a single comprehensive program.

    • "What lab testing do you recommend, and why?" Generic lab programs add cost without adding value. Make sure every test serves a purpose.

    • "Have you worked on adjacent sites?" Local experience translates directly to better-calibrated recommendations.

    When Conservative Actually Makes Sense

    To be clear: we're not advocating for cutting corners. Some sites genuinely require conservative approaches.

    Brownfield redevelopment projects with unknown fill materials need wider safety margins until contamination and soil variability are fully characterized. Sites with known seismic concerns or slope stability issues warrant additional analysis. Projects with zero tolerance for settlement: think sensitive manufacturing or medical facilities: justify more robust foundation systems even when basic bearing capacity isn't the concern.

    Brownfield Redevelopment Site

    The goal isn't eliminating conservatism. It's eliminating unnecessary conservatism that adds cost without adding value. Smart geotechnical engineering matches the investigation intensity and recommendation rigor to your project's actual risk profile.

    The Integrated Approach Advantage

    Here's where working with firms that combine geotechnical and environmental services creates real value. On many sites: especially urban infill and brownfield redevelopment: environmental conditions directly affect foundation decisions.

    Contaminated soils may require removal regardless of their bearing capacity. Groundwater management for environmental compliance can double as dewatering for foundation construction. Understanding both disciplines simultaneously prevents the expensive scenario where your geotech engineer recommends one approach and your environmental consultant requires another.

    Our work on complex infrastructure projects across the NYC metro area has reinforced this lesson repeatedly: the best geotechnical recommendations emerge when engineers understand the full project context, not just the soil column.

    The Bottom Line

    Your geotechnical report shouldn't be a liability shield masquerading as engineering. It should be a strategic tool that optimizes your foundation investment against actual site conditions.

    The $2,700 you spend on a soil investigation can save: or cost: ten times that amount depending on how the investigation is designed and how the recommendations are developed. Demand more from your geotech program than conservative defaults. Demand site-specific analysis, strategic boring locations, and recommendations calibrated to what you're actually building.

    Because in foundation engineering, "safe" and "smart" aren't always the same thing. The smartest approach accounts for real conditions, real loads, and real project economics: not worst-case assumptions that protect everyone except your budget.

    Need a second opinion on a geotechnical report, or planning an investigation for an upcoming project? Reach out to our team to discuss how targeted site investigation can optimize your foundation costs without compromising structural integrity.